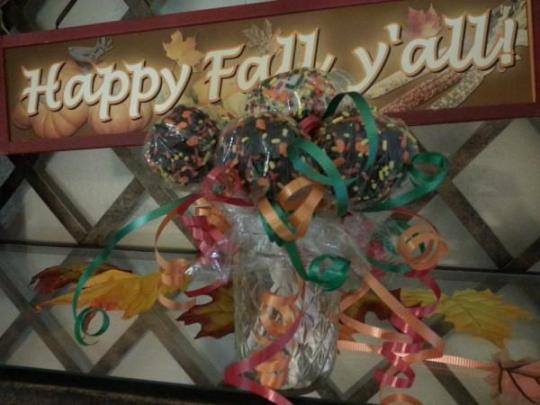
Here’s my recipe for making easy homemade cake pops.
This is a cute way to use a cake that got stuck to the pans and crumbled. That’s where these came from. I had two helpers in the kitchen, trying to help me make a cake (since I have a broken toe) and nobody floured the cake pans. Therefore, the cake didn’t come out of the pans in one piece. So, I just scooped it into a zip-lock bag and stuck it into the freezer and sent my hubby to Publix to buy his own birthday cake. 😉
Anyway, as soon as this kitchen disaster occurred, I already knew what I would do with the crumbled cake. Great way to recycle, huh?
To make cake pops, you need:
A cake mix, baked according to package directions – or a cake make from scratch
1 container frosting
candy melts (chocolate coating wafers – Michael’s crafts sells them)
Lollipop sticks (also from Michael’s Crafts)
sprinkles
Here’s how you put together the cake pops:
Prepare your drying stands. As you can see from the picture, I used egg cartons with holes poked in the top. I used my meat thermometer to poke the holes. They are centered over the depression for the eggs, spaced so the cake pops don’t collide.
Prepare a baking pan to cool the cake balls. Take waxed paper and cover the bottom of a baking pan – a cookie sheet with sides. Set aside for now.
Take your cooled cake and crumble it into crumbs in a very large mixing bowl.
Melt the frosting in the microwave for about 30 – 45 seconds and stir it until smooth and melted. Pour the frosting over the crumbled cake and stir it in until all the crumbs are moistened with the frosting. I only used 3/4 of the container of frosting.
I wore rubber gloves for this next step. Scoop up a rounded tablespoon of cake mixture and form into a ball. Make sure you compress it well, you do not want the cake balls to fall apart when you dip them in the chocolate. Place the cake balls on the wax paper as you make them. When you have made all the cake balls, place the pan in the refrigerator for about an hour for them to firm up.
When they’re thoroughly chilled, take out of the refrigerator.
Get a glass bowl or other microwave safe bowl out and place half the candy melts in the bowl. Microwave at 50% for 1 minute, stir and if needed microwave for another 30 seconds, until it is melted and smooth when stirred.
Take a stick and insert it into a cake ball. Then dip your cake pop into the melted chocolate, swirling it against the sides and all the way up to the stick. When it’s completely coated, sprinkle with decorative sprinkles and place them in the stands to dry. Carefully slide the sticks into the holes of your ghetto-cake pop stand. (I have also used a block of Styrofoam before but didn’t have one at home when I undertook this project today.)
Once they have dried and the candy coating is hardened, you can wrap them up in squares of plastic wrap and tie with curling ribbons.
You can display them in a bouquet fashion using a short vase or jar.
These can be made for any holiday, just switch up the colors of candy coating and the sprinkles.
These cake pops go fast, so hide a couple for yourself to enjoy later! This batch of cake pops is dwindling quick!
Homemade Cake Pops
Sharon Springfield


