Categories
Casseroles Corn Holidays Side Dishes Southern Vegetables Vegetarian

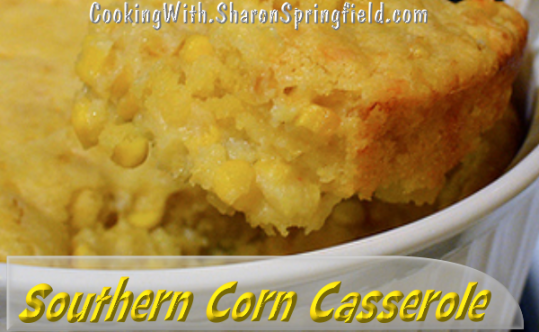
Southern Corn Casserole

Southern Corn Casserole


This southern classic – Corn Casserole – is rich and buttery, sweet and creamy and a must have at our family gatherings for holidays like Thanksgiving and Christmas.  This goes well as a side dish for spicy dishes like Chili, Cowboy Stew, and Cheesy Manwich Chicken Pasta.

1 cup self-rising cornmeal
3/4 cup self rising flour
1/4 cup sugar
dash of salt
1/3 cup melted butter
1/2 cup sour cream
1 egg
1 can creamed corn
1 1/2 cup buttermilk

Whisk together the dry ingredients in a mixing bowl.  Add the next 4 ingredients and stir just until combined.  Pour into a greased 2 quart casserole dish.  Bake at 400° for approximately 30 minutes.  The middle should not jiggle when pan is shaken around.  If its not firm then bake longer.

Spoon it out to serve.

This is similar to the recipe using Jiffy corn muffin mix, but I like to avoid pre-packaged foods whenever possible.  You could use a cornbread mix if you want and omit the cornmeal and flour.  I hope you enjoy my recipe for Southern Corn Casserole.  If so, share with your friends and Pin it on Pinterest.

Southern Corn Casserole

Sharon Springfield

Sharon Springfield

 Sharon Springfield on Facebookhttp://sharonspringfield.com/wp-content/uploads/2013/07/youtube-150x150.jpgSharon Springfield on Pinteresthttp://sharonspringfield.com/images/cooking-blog-logo.jpg

Categories
Main Dish

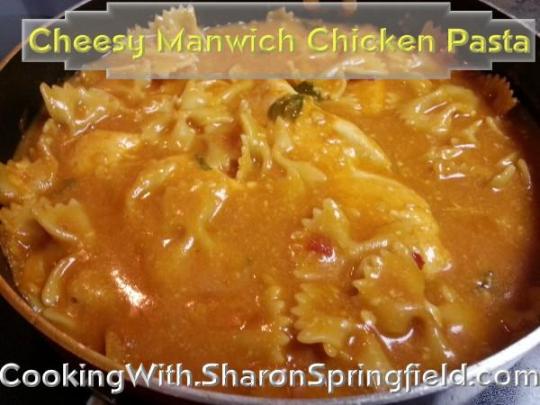
Cheesy Manwich Chicken Pasta


Cheesy Manwich Chicken Pasta

Cheesy Manwich Chicken Pasta

This Cheesy Manwich Chicken Pasta recipe is super easy, zesty and flavorful and best of all, you cook it all in one pot – therefore, easy to clean up!  Everyone in the family loved it and it really couldn’t have been easier.  Give it a try, I promise you’ll like it!

4 chicken cutlets, or chopped chicken breast seasoned with
Adobo seasoning (or similar seasoned salt)
1 teaspoon dried minced onion
2 Tbsp minced garlic
1 can Manwich Bold + 1 can water
2 cups chicken broth
1/2 pound of small dry pasta (I used bowtie)
1/4 cup fresh cilantro leaves
2 cups shredded cheddar cheese

Heat a small amount of butter in a deep sided skillet. Add onion and garlic and saute for one minute, then add seasoned chicken and saute for a couple of minutes.

Add chicken broth,  Manwich Bold Sloppy Joe Sauce, water, pasta and cilantro to the pot. Bring to a boil. Reduce heat to simmer for about 25-25 minutes.

Remove from heat and stir in shredded cheddar until well incorporated, reserving a handful to sprinkle on the top. Cover for a few minutes to allow the cheese to melt, and stir.

I served this with ChiChi’s Sweet Corn Cake but you could make a homemade corn casserole which is essentially the same thing but better.

Enjoy this easy Chicken Manwich Chicken Pasta!

Cheesy Manwich Chicken Pasta

Sharon Springfield

Sharon Springfield

Sharon Springfield on Facebookhttp://sharonspringfield.com/wp-content/uploads/2013/07/youtube-150x150.jpgSharon Springfield on Pinteresthttp://sharonspringfield.com/images/cooking-blog-logo.jpg


Categories
Desserts

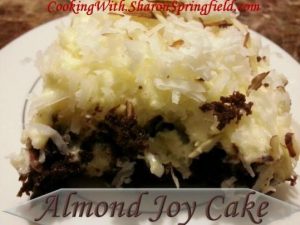
Almond Joy Cake

Almond Joy Cake


Almond Joy Cake

To make this super delicious Almond Joy Cake, you will need:

1 dark chocolate cake mix, made with 2 eggs, 1/4 cup coffee, 1 1/4 cup water, 1/2 cup oil

Bake in a greased 9 x 13 glass baking dish according to the directions on box.

When cake is done, remove from oven and cool on a wire rack.  After 10 minutes, use the handle of a wooden spoon to poke holes in cake – at 2 inches apart.

In a mixing bowl, mix together a 5.1 oz box of vanilla pudding, 1/2 teaspoon coconut extract and 1 7 oz jar of marshmallow fluff.  Pour half over the top of the cake, spreading over the holes so the pudding goes down all the holes and covers the entire cake;  Mix into the other half of the pudding, 4 oz softened cream cheese and 8 oz. softened cool whip.  

Spread this over the top of the cake.  Sprinkle with shredded coconut and slivered almonds. Chill for 2 hours before serving.

Enjoy this delicious Almond Joy Cake!  I thought it was awesome, hope you do too!

Sharon Springfield

Sharon SPringfield


Sharon Springfield on Facebookhttp://sharonspringfield.com/wp-content/uploads/2013/07/youtube-150x150.jpgSharon Springfield on Pinteresthttp://sharonspringfield.com/images/cooking-blog-logo.jpg

Sharon Springfield     |       My Cooking & Recipes Blog

Free Cookbooks! Sign up for my e-mail list here:  http://forms.aweber.com/form/62/982539962.htm


Almond Joy Cake

Categories
Fish Main Dish

Fish Tacos

Fish Tacos


Fish Tacos

Fish Tacos Recipe – Copycat Recipe Bahama Breeze Fish Tacos

Here’s the best fish tacos recipe I’ve found – it’s a copycat recipe from Bahama Breeze restaurant.  Just the perfect blend of tropical flavors and spicy salsa.  Give this great fish taco recipe a try.  You’ll love it!

Yield: 6 tacos, 2 servings

2 tablespoons olive oil
6 (2-ounce) pieces fresh whitefish, cut 1/2-inch thick
Salt and pepper to taste
6 flour tortillas
1 1/2 cups shredded iceberg lettuce
3/4 cup vine-ripened tomato salsa (see note)
1/2 of an avocado, cut into 6 slices
6 cilantro sprigs
Creamy Taco Sauce (recipe below)

Marinate the fish in a ziplock bag with lime juice, minced garlic, cumin, chili powder and adobo seasoning for 1 hour in the refrigerator.

Heat a 10-inch sauté pan on medium-high heat; add the olive oil. Place the seasoned fish in the heated pan and reduce heat to medium; sauté the fish for 2-3 minutes per side, just until it flakes easily and is cooked through to an internal temperature of 145F.

Place the flour tortillas on a dinner plate; top with a moist paper towel and microwave for 20 seconds.

Spread 2 tablespoons of creamy taco sauce around on tortilla.  Place one piece of seared fish in the center of tortilla; top each piece of fish with 1/4 cup shredded iceberg lettuce, 2 tablespoons vine-ripened tomato salsa, 1 slice of avocado and 1 cilantro sprig.

How to make the vine-ripened tomato salsa: Place 1/2 cup diced vine-ripened tomatoes, 1/4 cup diced onions, 1 tablespoon olive oil, 1 tablespoon freshly squeezed lime juice, 1/4 teaspoon Kosher salt, 1/4 teaspoon minced jalapeno and 1 tablespoon freshly chopped cilantro in bowl. Using a rubber spatula gently mix until combined; keep refrigerated until ready to serve.

How to make creamy taco sauce:  In a small bowl, whisk together 2 tablespoons salsa, 3 tablespoons pepper mayonnaise, 1 teaspoon Dijon mustard, 1 teaspoon honey, 2 tablespoons lime juice, 1 teaspoon apple cider vinegar, 2 tablespoons jelly (apricot, pineapple or orange marmalade will each work fine), 1/4 cup sour cream, a dash each cumin and chili powder, a couple dashes hot sauce (I used Cholula chipotle hot sauce).  Keep refrigerated.

Hope you will enjoy this great fish taco recipe!  It’s really the best you’ll ever have!

Fish Tacos

Sharon Springfield

Sharon Springfield

 Sharon Springfield on Facebookhttp://sharonspringfield.com/wp-content/uploads/2013/07/youtube-150x150.jpgSharon Springfield on Pinteresthttp://sharonspringfield.com/images/cooking-blog-logo.jpg

Categories
Desserts

Easy Homemade Cake Pops

Easy Homemade Cake Pops


Here’s my recipe for making easy homemade cake pops.

This is a cute way to use a cake that got stuck to the pans and crumbled.  That’s where these came from.  I had two helpers in the kitchen, trying to help me make a cake (since I have a broken toe) and nobody floured the cake pans.  Therefore, the cake didn’t come out of the pans in one piece.  So, I just scooped it into a zip-lock bag and stuck it into the freezer and sent my hubby to Publix to buy his own birthday cake. 😉

Anyway, as soon as this kitchen disaster occurred, I already knew what I would do with the crumbled cake.  Great way to recycle, huh?

To make cake pops, you need:

A cake mix, baked according to package directions – or a cake make from scratch
1 container frosting
candy melts (chocolate coating wafers – Michael’s crafts sells them)
Lollipop sticks (also from Michael’s Crafts)
sprinkles

Here’s how you put together the cake pops:

Prepare your drying stands.  As you can see from the picture, I used egg cartons with holes poked in the top.  I used my meat thermometer to poke the holes.  They are centered over the depression for the eggs, spaced so the cake pops don’t collide.

Prepare a baking pan to cool the cake balls.  Take waxed paper and cover the bottom of a baking pan – a cookie sheet with sides.  Set aside for now.

Take your cooled cake and crumble it into crumbs in a very large mixing bowl.
Melt the frosting in the microwave for about 30 – 45 seconds and stir it until smooth and melted.  Pour the frosting over the crumbled cake and stir it in until all the crumbs are moistened with the frosting.  I only used 3/4 of the container of frosting.

I wore rubber gloves for this next step.  Scoop up a rounded tablespoon of cake mixture and form into a ball.  Make sure you compress it well, you do not want the cake balls to fall apart when you dip them in the chocolate.  Place the cake balls on the wax paper as you make them.  When you have made all the cake balls, place the pan in the refrigerator for about an hour for them to firm up.

When they’re thoroughly chilled, take out of the refrigerator.

Get a glass bowl or other microwave safe bowl out and place half the candy melts in the bowl.  Microwave at 50% for 1 minute, stir and if needed microwave for another 30 seconds, until it is melted and smooth when stirred.

Take a stick and insert it into a cake ball.  Then dip your cake pop into the melted chocolate, swirling it against the sides and all the way up to the stick.  When it’s completely coated, sprinkle with decorative sprinkles and place them in the stands to dry.  Carefully slide the sticks into the holes of your ghetto-cake pop stand. (I have also used a block of Styrofoam before but didn’t have one at home when I undertook this project today.)

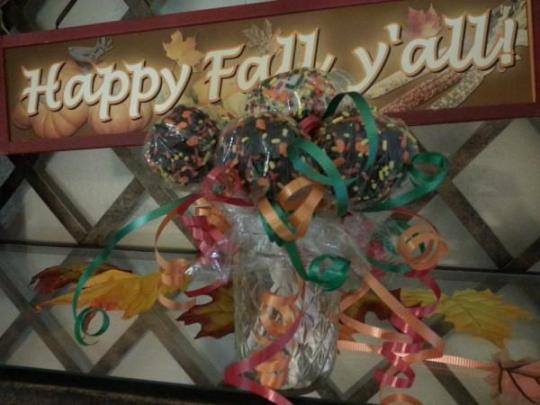
Once they have dried and the candy coating is hardened, you can wrap them up in squares of plastic wrap and tie with curling ribbons.

You can display them in a bouquet fashion using a short vase or jar.

These can be made for any holiday, just switch up the colors of candy coating and the sprinkles.

These cake pops go fast, so hide a couple for yourself to enjoy later!  This batch of cake pops is dwindling quick!

Homemade Cake Pops

Sharon Springfield

Sharon Springfield

 Sharon Springfield on Facebookhttp://sharonspringfield.com/wp-content/uploads/2013/07/youtube-150x150.jpgSharon Springfield on Pinteresthttp://sharonspringfield.com/images/cooking-blog-logo.jpg