Categories
Desserts

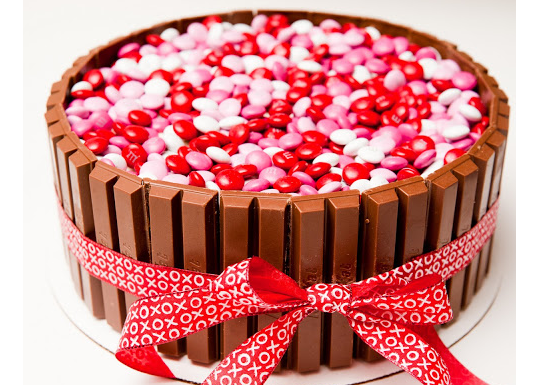
Super Sweetie Valentine Cake

Super Sweetie Valentine Cake


Valentine’s Day Cake

Here’s a super simple idea to decorate any round layer cake in a valentine’s theme.  Just make a double layer round cake and frost it with any cake / frosting combo that suits you.  Then stack Kit-Kat bars around the edges, securing them with a ribbon tied in a bow.  Then top the cake with Valentine M&M’s!  Isn’t it just adorable?  Make this Valentine’s Day extra special with this super nice cake!

Happy Valentine’s Day!

Pin The Recipe!  http://www.pinterest.com/pin/280278776783644761/

Sharon Springfield

Sharon Springfield

 Sharon Springfield on Facebookhttp://sharonspringfield.com/wp-content/uploads/2013/07/youtube-150x150.jpgSharon Springfield on Pinteresthttp://sharonspringfield.com/images/cooking-blog-logo.jpg

Categories
Desserts

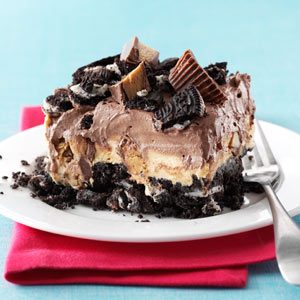
Peanut Butter Chocolate Dessert Recipe

Peanut Butter Chocolate Dessert Recipe


Peanut Butter Chocolate Dessert

This Peanut Butter Chocolate Dessert Recipe is the ultimate dessert.  It has everything: Oreo cookie crust, creamy peanut butter pie filling, chocolate pudding pie filling, more oreo cookies and peanut butter cups on top.  Wow!  This is a very rich and sweet treat.  Hope you love it!

Ingredients:

20 chocolate cream-filled chocolate sandwich cookies, divided
2 tablespoons butter, softened
1 package (8 ounces) Cream Cheese, softened
1/2 cup peanut butter
1-1/2 cups confectioners’ sugar, divided
1 carton (16 ounces) frozen whipped topping, thawed, divided
15 miniature peanut butter cups, chopped
1 cup cold milk
1 package (3.9 ounces) instant chocolate fudge pudding mix

Directions:

Crush 16 cookies; toss with the butter. Press into an ungreased 9-in. square dish; set aside.

In a large bowl, beat the cream cheese, peanut butter and 1 cup confectioners’ sugar until smooth. Fold in half of the whipped topping. Spread over crust. Sprinkle with peanut butter cups.

In another large bowl, beat the milk, pudding mix and remaining confectioners’ sugar on low speed for 2 minutes Let stand for 2 minutes or until soft-set. Fold in remaining whipped topping.

Spread over peanut butter cups. Crush remaining cookies; sprinkle over the top. Cover and chill for at least 3 hours. Yield: 12-16 servings.

Pin it! http://www.pinterest.com/pin/280278776783616686/

Peanut Butter Chocolate Dessert

Sharon Springfield

Sharon Springfield

 Sharon Springfield on Facebookhttp://sharonspringfield.com/wp-content/uploads/2013/07/youtube-150x150.jpgSharon Springfield on Pinteresthttp://sharonspringfield.com/images/cooking-blog-logo.jpg

Categories
Desserts

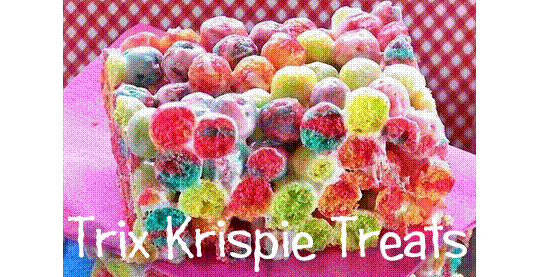
Trix Krispie Treats

Trix Krispie Treats


These colorful Trix Krispie Treats are a real hit with kids.  I’ve made these with Reeses peanut butter chocolate puffs cereal too.

1 bag of mini marshmallows
10 cups Trix cereal
¼ cup butter

Place the butter and marshmallows in a glass bowl and pop in the microwave for about 2 to 3 minutes to melt.
Stir well.  Mix in Trix cereal and stir.  Dump into a large buttered 9 x 13″ pan and press down with a spoon or waxed paper.
Cut into squares. 🙂

Great treat to serve at a kids party or Easter egg hunt.

Sharon Springfield

Sharon Springfield

Sharon Springfield

 Sharon Springfield on Facebookhttp://sharonspringfield.com/wp-content/uploads/2013/07/youtube-150x150.jpgSharon Springfield on Pinteresthttp://sharonspringfield.com/images/cooking-blog-logo.jpg


Categories
Desserts

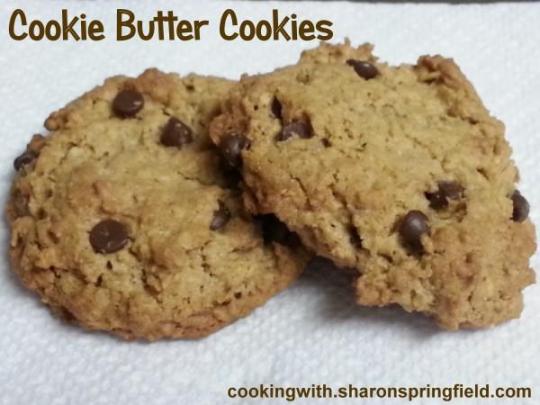
Cookie Butter Cookies

Cookie Butter Cookies


Cookie Butter Cookies

Have you fallen in love with cookie butter yet?  I’m newly addicted and am perfectly content to just eat cookie butter by the spoonfulls right out of the jar.  But today I was feeling adventerous and wanted to try to substitute peanutbutter for cookie butter in a cookie recipe.  So how were they?  Super duper yummy!

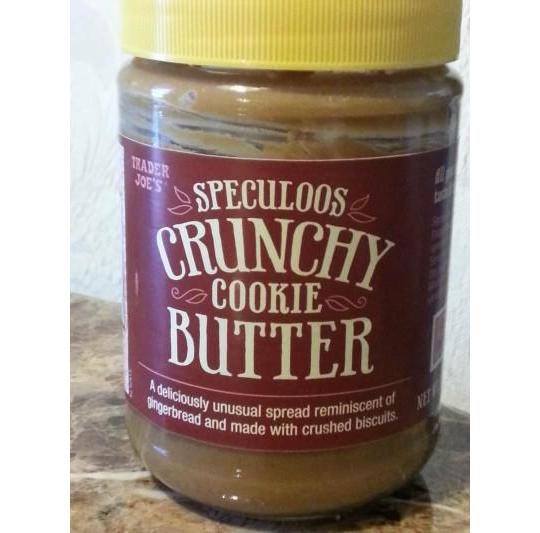
If you don’t have cookie butter, you could certainly use peanut butter, almond butter or any kind of nut butter you like.  But, if you haven’t ever tried cookie butter, I highly recommend you find some so your life may be complete.  It can be found at Trader Joe’s and the jar looks like this:

Cookie Butter


Cookie Butter Cookie Recipe

1 stick butter, softened
1/2 cup Cookie Butter or peanut butter
3/4 cup sugar
1 cup brown sugar
2 eggs
2 tablespoons milk
1 teaspoon vanilla
1 cup graham cracker crumbs
1/2 cup all purpose flour
1 teaspoon baking soda
1/2 teaspoon salt
4 cups quick oats
1 cup mini chocolate chips

Preheat oven to 375° F.

In a mixing bowl cream together the butter and cookie butter (or other nut butter).  When its well mixed add the sugar, eggs and vanilla and mix well.  Stir in the graham cracker crumbs, flour, baking soda and salt until well mixed.  Stir in oats until incorporated.  Carefully stir in the chocolate chips just until mixed in.

Drop rounded teaspoonfulls of cookie dough onto an ungreased cookie sheet, spacing them 2 inches apart.  Bake for approximately 12 minutes.

This recipe makes about 4 dozen cookies.

You can freeze the cookie dough and bake later.  Take a rounded teaspoon of cookie dough and form it into a ball then slightly flatten it until it’s a disk approximately 1/2″ thick.  Stack in a single layer in a freezer safe container.  Seperate layers of cookie dough by placing waxed paper between the layers.  Seal the container and freeze.

I hope you enjoy this Cookie Butter Cookies recipe.  Don’t forget to share this recipe on Facebook and Pinterest!

Sharon Springfield

Sharon Springfield

Sharon Springfield on Facebookhttp://sharonspringfield.com/wp-content/uploads/2013/07/youtube-150x150.jpgSharon Springfield on Pinteresthttp://sharonspringfield.com/images/cooking-blog-logo.jpg

Categories
Desserts

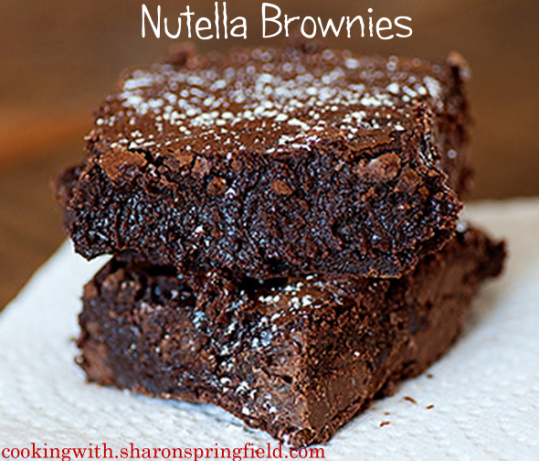
Nutella Brownies

Nutella Brownies


Nutella Brownies

INGREDIENTS:

1 cup (2 sticks) butter
2 1/4 cups sugar
1/2 cup Nutella
4 large eggs
1 1/4 cups cocoa powder
1 teaspoon salt
1 teaspoon baking powder
1 teaspoon espresso powder, optional
1 tablespoon vanilla extract
1 1/2 cups all-purpose flour
10 ounce package Hershey’s Milk Chocolate Baking Melts (or chocolate chips)

DIRECTIONS:

Pre-heat the oven to 350 degrees. Butter a 9×13 baking dish.
In small saucepan over low heat, melt butter completely. Stir in sugar and continue cooking for 1-2 minutes, stirring constantly. Do not allow sugar mixture to boil.
Remove from the heat and stir in the Nutella until well combined.

Pour butter mixture into a large bowl or stand mixer, beat in cocoa powder, eggs, salt, baking powder, espresso powder, and vanilla extract. Mix until well combined.
Stir in the flour and baking melts until just combined.

Spread into prepared pan (batter will be very thick and sticky) and bake for about 30-35 minutes, until a tester comes out mostly clean. The edges should be set and the center should still look slightly moist, but not uncooked. Cool on a wire rack.

This Nutella Brownies Recipe was one of the most shared recipes on Pinterest for 2013.

Sharon Springfield

Sharon Springfield

 Sharon Springfield on Facebookhttp://sharonspringfield.com/wp-content/uploads/2013/07/youtube-150x150.jpgSharon Springfield on Pinteresthttp://sharonspringfield.com/images/cooking-blog-logo.jpg


Categories
Desserts

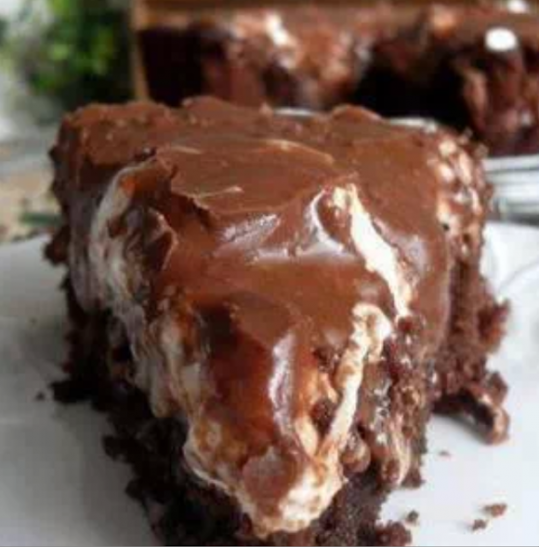
Fudge Brownie Pie

Fudge Brownie Pie


Fudge Brownie Pie

¾ cup flour
1 cup sugar
¼ cup unsweetened cocoa powder, sifted
1 teaspoon baking powder
¼ teaspoon salt
4 oz butter, melted
2 large eggs, beaten
2 teaspoons vanilla
½ cup chopped toasted pecans
2 handfuls of mini marshmallows

For the Frosting:

¼ cup butter, melted
¼ cup cocoa powder
¼ cup evaporated milk
1 cup powdered sugar

Preheat the oven to 350 degrees.  Butter a 9 inch spring form pan, set aside.

Whisk together the flour, sugar, cocoa powder, baking powder and salt in a bowl.  Beat together the butter, eggs and vanilla.  Add to the dry ingredients and mix until smooth.  Stir in the toasted nuts.  Pour into the prepared pan.

Bake on a middle shelf of the oven for 25 to 30 minutes, or until a toothpick inserted in the center comes out clean.  Immediately sprinkle the marshmallows on top and return to the oven for a few minutes to melt the marshmallows. Remove from the oven and carefully spread the chocolate frosting over the top.

To make the chocolate frosting: mix all the ingredients together in a bowl, beating with an electric whisk until smooth and thick.  Spread on the hot marshmallows.  Let cool completely.  Cut into wedges to serve.

Fudge Brownie Pie

Sharon Springfield

Sharon Springfield

 Sharon Springfield on Facebookhttp://sharonspringfield.com/wp-content/uploads/2013/07/youtube-150x150.jpgSharon Springfield on Pinteresthttp://sharonspringfield.com/images/cooking-blog-logo.jpg

Categories
Desserts

Caramel Pecan Delight Pie

Caramel Pecan Delight Pie

Caramel Pecan Delight Pie Recipe

Makes 2 pies.   This cool and creamy pie is a perfect summer dessert!

2 cups rough chopped pecans
2 cups flaked coconut (optional)
1 stick butter
8 oz cream cheese, softened
14 oz can sweetened condensed milk
16 oz cool whip
1 jar caramel ice cream topping
2 graham cracker crusts – ready made

In a skillet, lightly brown the pecans and coconut in the butter.  Set aside to cool.
With an electric mixer, blend the cream cheese, sweetened condensed milk and cool whip.
Divide evenly between the two pie crusts.  Top each pie with the pecan / coconut mixture.
Drizzle the entire jar of caramel topping over the tops of both pies.  Refrigerate or freeze for at least 3 to 4 hours.  The pies cut best if they are frozen.  Top with extra Cool Whip if desired.

Caramel Pecan Delight Pie

Sharon Springfield

Sharon Springfield

Sharon Springfield on Facebookhttp://sharonspringfield.com/wp-content/uploads/2013/07/youtube-150x150.jpgSharon Springfield on Pinteresthttp://sharonspringfield.com/images/cooking-blog-logo.jpg

Categories
Desserts

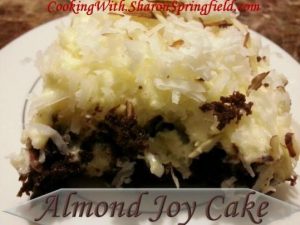
Almond Joy Cake

Almond Joy Cake


Almond Joy Cake

To make this super delicious Almond Joy Cake, you will need:

1 dark chocolate cake mix, made with 2 eggs, 1/4 cup coffee, 1 1/4 cup water, 1/2 cup oil

Bake in a greased 9 x 13 glass baking dish according to the directions on box.

When cake is done, remove from oven and cool on a wire rack.  After 10 minutes, use the handle of a wooden spoon to poke holes in cake – at 2 inches apart.

In a mixing bowl, mix together a 5.1 oz box of vanilla pudding, 1/2 teaspoon coconut extract and 1 7 oz jar of marshmallow fluff.  Pour half over the top of the cake, spreading over the holes so the pudding goes down all the holes and covers the entire cake;  Mix into the other half of the pudding, 4 oz softened cream cheese and 8 oz. softened cool whip.  

Spread this over the top of the cake.  Sprinkle with shredded coconut and slivered almonds. Chill for 2 hours before serving.

Enjoy this delicious Almond Joy Cake!  I thought it was awesome, hope you do too!

Sharon Springfield

Sharon SPringfield


Sharon Springfield on Facebookhttp://sharonspringfield.com/wp-content/uploads/2013/07/youtube-150x150.jpgSharon Springfield on Pinteresthttp://sharonspringfield.com/images/cooking-blog-logo.jpg

Sharon Springfield     |       My Cooking & Recipes Blog

Free Cookbooks! Sign up for my e-mail list here:  http://forms.aweber.com/form/62/982539962.htm


Almond Joy Cake

Categories
Desserts

Easy Homemade Cake Pops

Easy Homemade Cake Pops


Here’s my recipe for making easy homemade cake pops.

This is a cute way to use a cake that got stuck to the pans and crumbled.  That’s where these came from.  I had two helpers in the kitchen, trying to help me make a cake (since I have a broken toe) and nobody floured the cake pans.  Therefore, the cake didn’t come out of the pans in one piece.  So, I just scooped it into a zip-lock bag and stuck it into the freezer and sent my hubby to Publix to buy his own birthday cake. 😉

Anyway, as soon as this kitchen disaster occurred, I already knew what I would do with the crumbled cake.  Great way to recycle, huh?

To make cake pops, you need:

A cake mix, baked according to package directions – or a cake make from scratch
1 container frosting
candy melts (chocolate coating wafers – Michael’s crafts sells them)
Lollipop sticks (also from Michael’s Crafts)
sprinkles

Here’s how you put together the cake pops:

Prepare your drying stands.  As you can see from the picture, I used egg cartons with holes poked in the top.  I used my meat thermometer to poke the holes.  They are centered over the depression for the eggs, spaced so the cake pops don’t collide.

Prepare a baking pan to cool the cake balls.  Take waxed paper and cover the bottom of a baking pan – a cookie sheet with sides.  Set aside for now.

Take your cooled cake and crumble it into crumbs in a very large mixing bowl.
Melt the frosting in the microwave for about 30 – 45 seconds and stir it until smooth and melted.  Pour the frosting over the crumbled cake and stir it in until all the crumbs are moistened with the frosting.  I only used 3/4 of the container of frosting.

I wore rubber gloves for this next step.  Scoop up a rounded tablespoon of cake mixture and form into a ball.  Make sure you compress it well, you do not want the cake balls to fall apart when you dip them in the chocolate.  Place the cake balls on the wax paper as you make them.  When you have made all the cake balls, place the pan in the refrigerator for about an hour for them to firm up.

When they’re thoroughly chilled, take out of the refrigerator.

Get a glass bowl or other microwave safe bowl out and place half the candy melts in the bowl.  Microwave at 50% for 1 minute, stir and if needed microwave for another 30 seconds, until it is melted and smooth when stirred.

Take a stick and insert it into a cake ball.  Then dip your cake pop into the melted chocolate, swirling it against the sides and all the way up to the stick.  When it’s completely coated, sprinkle with decorative sprinkles and place them in the stands to dry.  Carefully slide the sticks into the holes of your ghetto-cake pop stand. (I have also used a block of Styrofoam before but didn’t have one at home when I undertook this project today.)

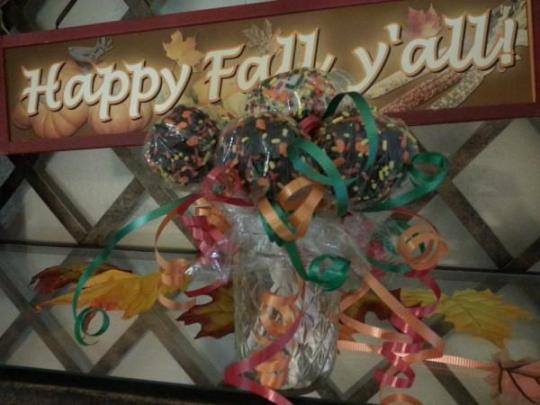
Once they have dried and the candy coating is hardened, you can wrap them up in squares of plastic wrap and tie with curling ribbons.

You can display them in a bouquet fashion using a short vase or jar.

These can be made for any holiday, just switch up the colors of candy coating and the sprinkles.

These cake pops go fast, so hide a couple for yourself to enjoy later!  This batch of cake pops is dwindling quick!

Homemade Cake Pops

Sharon Springfield

Sharon Springfield

 Sharon Springfield on Facebookhttp://sharonspringfield.com/wp-content/uploads/2013/07/youtube-150x150.jpgSharon Springfield on Pinteresthttp://sharonspringfield.com/images/cooking-blog-logo.jpg
Categories
Desserts

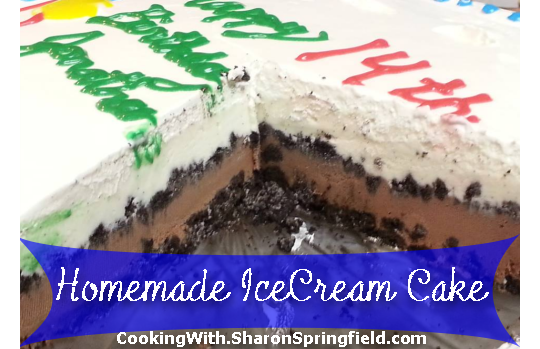
Homemade Ice Cream Cake

Homemade Ice Cream Cake


Hey y’all…since it’s summer and really hot, my kids have been begging me to make another Ice Cream Cake.  So I did…

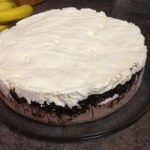
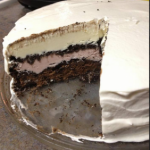
This time we took pictures of the procedure in case you wanted to make one too.  It’s really not that hard to do and it’s really delicious!  You can make it with whatever flavors you like.  My first one was with lactose free Tofutti ice cream.  This one is with regular ice cream and frozen yogurt: chocolate brownie, strawberry and vanilla.

Crushed Oreos


The first step is to prepare your pan.  Line a springform pan with a large sheet of plastic wrap.  I had some extra wide plastic wrap but if you don’t, just use a couple strips of regular sized and overlap them so the entire pan and up the sides is covered with the plastic.

Line the Pan

Next, crush 2 packages of cookies (Oreo’s or similar) in a ziplock bag and a meat mallet.  Do about 1/3 of the package at a time.  Spread a layer of the crumbs over the bottom of the prepared pan.

First Layer Of Ice Cream


Spoon softened ice cream over top of the oreo crust layer, spreading out evenly.  You will use about 1 quart for this layer.

Second Oreo Layer


Sprinkle a layer of crushed cookies on top and cover with plastic wrap and put into freezer for at least 30 minutes.

Second Ice Cream Layer


Remove from freezer and uncover.  Spread another layer of ice cream over the crumb layer. Top with more cookie crumbs and the cover with plastic wrap.  Freeze for at least 30 minutes.  Repeat with final layer of ice cream.  Cover and freeze overnight.

Freeze Overnight

The next day, remove all plastic wrap from the ice cream cake and place on a cake plate.

image015

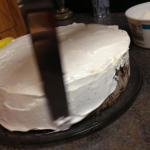
Spread with thawed cool whip.  Freeze uncovered for an hour then cover with plastic wrap.

image017


When ready to serve, remove from freezer about 15 minutes before serving.  Cut using a big, bad chef’s knife.  Enjoy!

*Try different flavor combos according to your taste.  Some to try…coffee, chocolate, caramel, or different flavors of sherbet with crushed shortbread cookies or coconut cookies in between the layers.

Homemade Ice Cream Cake


Sharon Springfield

Sharon Springfield
 Sharon Springfield on Facebookhttp://sharonspringfield.com/wp-content/uploads/2013/07/youtube-150x150.jpgSharon Springfield on Pinteresthttp://sharonspringfield.com/images/cooking-blog-logo.jpg