Categories
Main Dish Tomatoes

Lighter Tomato Pie

Lighter Tomato PieTomato Pie is a perfect light dinner for summertime.  If you’ve got a few nice fresh tomatoes that you don’t know what to do with, give this delicious tomato pie recipe a try.  As you can see, before I could even get around to taking a picture, a couple slices had mysteriously disappeared.  This is a lighter version than the Paula Deen tomato pie, which I found to be delicious, but also very heavy and greasy.  Give this lighter tomato pie recipe a try and enjoy the fresh tomatoes of summer.

Ingredients:

4 medium tomatoes
8 fresh basil leaves, thinly sliced
4 oz sliced prosciutto (or 4 slices of crisp bacon, crumbled)
1 frozen prepared pie crust
1/4 cup Panko bread crumbs
2 tablespoons grated Parmesan cheese
dash(es) garlic powder, dried oregano, dried basil
salt & pepper
1/3 cup light mayonnaise
1/3 cup garlic/herb cheese spread

Directions:

Preheat oven to 400°F

Slice tops off of tomatoes and scoop out and discard tomato seeds.  Slice tomatoes 1/4″ thick.  Lay tomato slices on a clean kitchen towel and lightly sprinkle with salt on each side.  Let sit for 15 minutes or so then press with another towel to soak up excess moisture from tomatoes.  This step prevents the pie from being mushy.

While waiting for tomatoes to dry out, slice prosciutto (or cook and crumble bacon).

Prick bottom and sides of pie crust.  Place on baking sheet (for easier handling) and bake for 8 – 10 minutes.

In a small bowl, combine bread crumbs, Parmesan cheese, garlic powder, dried oregano and dried basil.

In another small bowl, mix together the light mayonnaise, garlic/herb cheese spread and fresh basil.

To assemble the tomato pie, sprinkle 2 teaspoons of the bread crumb mixture into the pie crust.  Layer 1/2 of the tomato slices into the pie crust, sprinkle with salt and pepper then 1/2 of the prosciutto (or bacon).  Top with the mayonnaise – herb cheese mixture – spread evenly.  Repeat layers of tomato, salt, pepper, prosciutto (or bacon).  Sprinkle the remaining bread crumb mixture evenly over the top layer.

Bake for 20 – 25 minutes or until tomatoes are soft and topping is lightly browned.

May be served warm or cold.

Only 230 calories per 1/8th of pie.

This recipe is my modified version of a Publix Aprons recipe.

If you like my recipes, be a sweetie pie and share on Facebook,
Like my page “I Love To Cook” and Pin these yummy recipes on Pinterest.  🙂

Here’s the Pinterest link for this recipe:  Lighter Tomato Pie

Sharon Springfield

Sharon Springfield  

Sharon Springfield on PinterestSharon Springfield on FacebookFollow Me On Google+

http://sharonspringfield.com/images/cooking-blog-logo.jpghttp://sharonspringfield.com/wp-content/uploads/2013/07/youtube-150x150.jpg


Powered by WordPress Plugins – Get the full version!

Lighter Tomato Pie


Categories
Breakfast Casseroles Main Dish Quiche Vegetarian

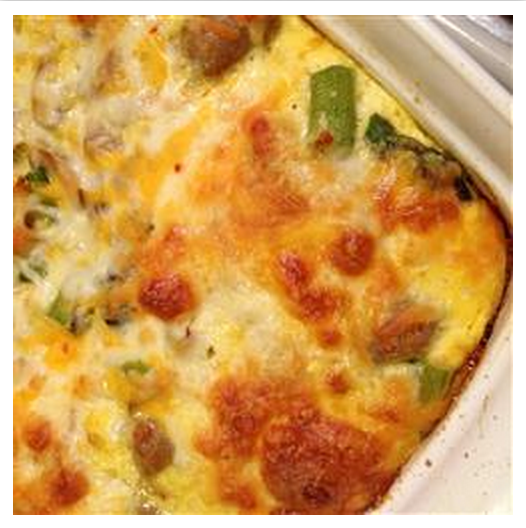
Asparagus Mushroom Strata

English Muffin Asparagus Mushroom Strata*Photo by Oliveland

INGREDIENTS:
2 teaspoons butter, or as needed
1 3/4 cups sliced crimini mushrooms
5 English muffins, split and toasted
1 cup shredded Colby-Monterrey Jack
cheese
1 pound fresh asparagus, trimmed and
cut into 1-inch pieces
1/2 cup chopped red bell pepper
1/2 onion, finely chopped
8 eggs
2 cups milk
1 teaspoon salt
1 teaspoon dry mustard powder
1/4 teaspoon ground black pepper
1 cup shredded Colby-Monterrey Jack
cheese

DIRECTIONS:
Melt the butter in a skillet over medium heat, and cook and stir the mushrooms until their liquid has mostly evaporated and the mushrooms are beginning to brown, about 10 minutes. Set the mushrooms aside.
Grease a 9×13 inch baking dish, and arrange 8 muffin halves, cut sides up, in the bottom of the dish. Stuff pieces of remaining muffins into the spaces between the halves. Spread 1 cup of Colby-Monterrey Jack cheese over the muffins in a layer, and distribute the asparagus pieces, mushrooms, red pepper, and onion over the cheese.
Whisk together eggs, milk, salt, dry mustard, and black pepper in a bowl, and pour the egg mixture over the muffins and vegetables. Cover the dish, and refrigerate overnight.
The next day, preheat oven to 375 degrees F (190 degrees C).
Remove the casserole from the refrigerator and let stand for 30 minutes. Spread 1 cup of Colby-Monterrey Jack cheese in a layer over the casserole.
Bake in the preheated oven until a knife inserted near the edge comes out clean, 40 to 45 minutes. Let stand 5 to 10 minutes before cutting into squares.
Original recipe at:
http://allrecipes.com/Recipe/Overnight-Asparagus-Mushroom-Strata/Detail.aspx

If you like my recipes, be a sweetie pie and share on Facebook,
Like my page “I Love To Cook” and Pin these yummy recipes on Pinterest.  🙂

Here’s the Pinterest link for this recipe:  Asparagus Mushroom Strata

Sharon Springfield

Sharon Springfield  

Sharon Springfield on PinterestSharon Springfield on FacebookFollow Me On Google+

http://sharonspringfield.com/images/cooking-blog-logo.jpghttp://sharonspringfield.com/wp-content/uploads/2013/07/youtube-150x150.jpg


Powered by WordPress Plugins – Get the full version!

Asparagus Mushroom Strata

Categories
Beef Bell Pepper Crockpot Main Dish Rice Slow Cooker Steak

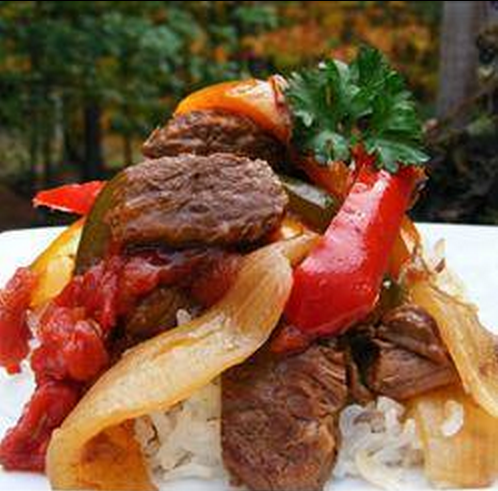
Slow Cooker Pepper Steak

Slow Cooker Pepper Steak*

Crock Pot Pepper Steak Recipe:

Ingredients
2 pounds beef sirloin, cut into 2 inch strips
garlic powder to taste
3 tablespoons vegetable oil
1 cube beef bouillon
1/4 cup hot water
1 tablespoon cornstarch
1/2 cup chopped onion
2 large green bell peppers, roughly chopped
1 (14.5 ounce) can stewed tomatoes, with liquid
3 tablespoons soy sauce
1 teaspoon white sugar
1 teaspoon salt

Directions
Sprinkle strips of sirloin with garlic powder to taste. In a large skillet over medium heat, heat the vegetable oil and brown the seasoned beef strips. Transfer to a slow cooker.
Mix bouillon cube with hot water until dissolved, then mix in cornstarch until dissolved. Pour into the slow cooker with meat. Stir in onion, green peppers, stewed tomatoes, soy sauce, sugar, and salt.
Cover, and cook on High for 3 to 4 hours, or on Low for 6 to 8 hours.

*Photo credit unknown

If you like my recipes, be a sweetie pie and share on Facebook,
Like my page “I Love To Cook” and Pin these yummy recipes on Pinterest.  🙂

Here’s the Pinterest link for this recipe:  Slow Cooker Pepper Steak Recipe

Sharon Springfield

Sharon Springfield  

Sharon Springfield on PinterestSharon Springfield on FacebookFollow Me On Google+

http://sharonspringfield.com/images/cooking-blog-logo.jpghttp://sharonspringfield.com/wp-content/uploads/2013/07/youtube-150x150.jpg


Powered by WordPress Plugins – Get the full version!

Slow Cooker Pepper Steak Recipe

Categories
Beef Crockpot Main Dish Mushrooms Roast Beef Slow Cooker

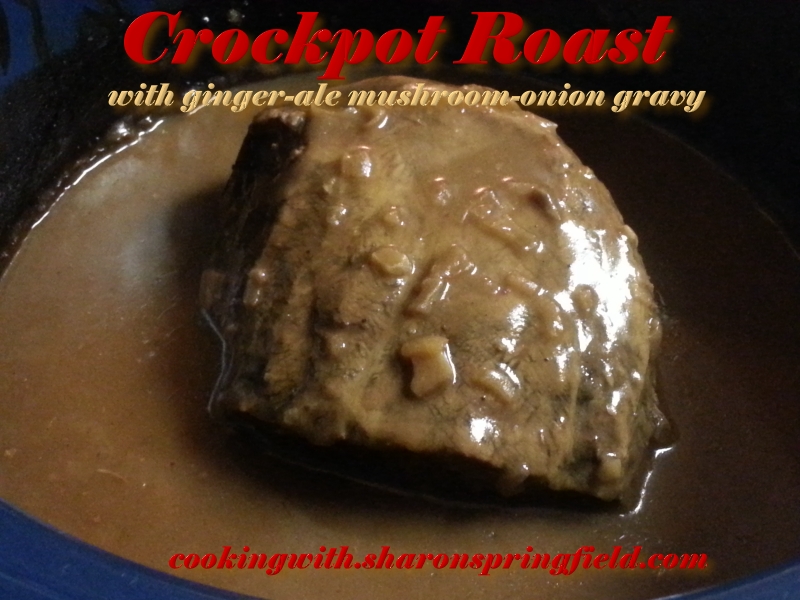
Crockpot Roast with Ginger-ale Mushroom Onion Gravy

Crockpot Roast with Ginger-ale Mushroom Onion Gravy

This delicious crockpot roast has a delicious gravy with a surprising ingredient: Ginger-Ale!

This is now my favorite crockpot roast recipe as all others fall short in the flavor department.

Crockpot Roast with Ginger-ale Mushroom Onion Gravy 

Ingredients:

3 pound sirloin tip roast
1/3 cup all-purpose flour
1/2 envelope onion soup mix (using full envelope makes it too salty)
1 envelope mushroom gravy mix (may use brown gravy mix instead)
2 cups ginger ale

Directions:

Grease the inside of your crock pot with Crisco.  Place the roast in the crock pot.  Whisk together the rest of the ingredients in a small mixing bowl. Pour over the roast, cover and cook on low for 8 hours.

Whisk the gravy and flip the roast over every couple hours.

Slice and serve with mashed potatoes or cooked rice.

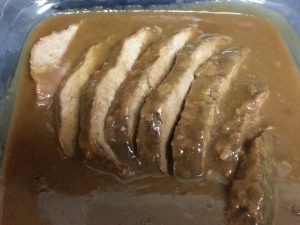
Sliced Crock Pot Roast

If you like my recipes, be a sweetie pie and share on Facebook,
Like my page “I Love To Cook” and Pin these yummy recipes on Pinterest.  🙂

Here’s the Pinterest link for this recipe:  Crock pot Roast with Ginger-ale Mushroom Onion Gravy 

Sharon Springfield

Sharon Springfield  

Sharon Springfield on PinterestSharon Springfield on FacebookFollow Me On Google+

http://sharonspringfield.com/images/cooking-blog-logo.jpghttp://sharonspringfield.com/wp-content/uploads/2013/07/youtube-150x150.jpg


Powered by WordPress Plugins – Get the full version!

Crockpot Roast with Ginger-ale Mushroom Onion Gravy 

Categories
Desserts Ice Cream

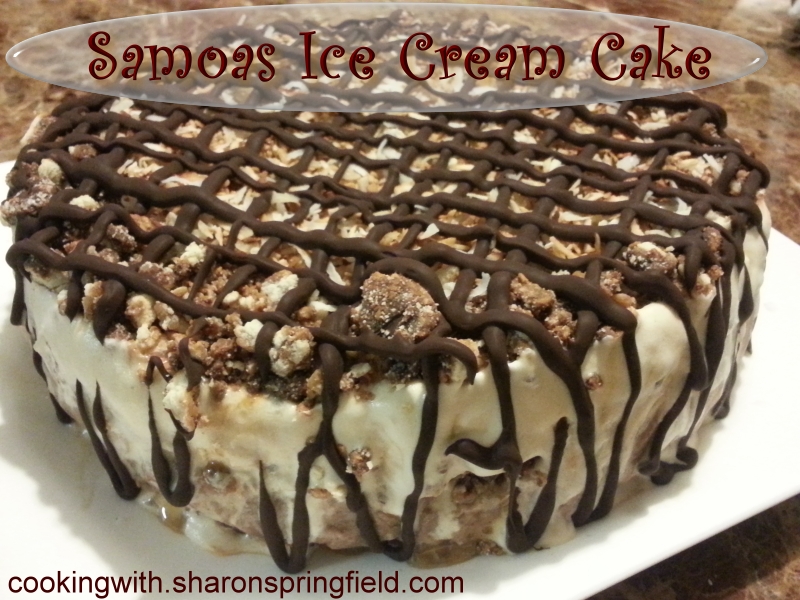
Samoas Ice Cream Cake

Samoas Ice Cream Cake

Recently as my son’s birthday was approaching, asked him what kind of birthday cake he wanted and gave him my phone to flip through my pinterest recipe board.  He saw a recipe for Samoas bars and said he wanted an ice cream cake with Samoas bars on top.  So, I took on his challenge and came up with this fantastic ice cream cake with the great taste of Samoas Girl Scout cookies.

However, his birthday is not at the time that you can buy Samoas, so I had to improvise.  Keebler makes a cookie that’s pretty close, so that’s what I used instead of the real deal.

Keebler Coconut Dreams Cookies


This ice cream cake is made in the same fashion as the one I posted last year, so refer to my prior post on how to make a homemade ice cream cake for more detailed instructions and pictures of the process.

Samoas Ice Cream Cake

For the Samoas Ice Cream Cake, you will need the following ingredients:

Ingredients:

2 pkg Keebler Coconut Dreams cookies or Samoas Girl Scout Cookies
1/2 gal chocolate ice cream or frozen yogurt
1/2 gal dulce de leche (caramel) ice cream or frozen yogurt
1 bag of shredded coconut
caramel sauce
chocolate chips

Directions:

First, prepare a springform pan by lining it with plastic wrap.

Using a food processor, chop up the cookies into crumbles.  Do not turn them to dust, there should be some chunks.

Toast the coconut in a nonstick skillet.  You will need to do this in about 3 batches for a whole bag of coconut.  (I actually only did about 2/3 of the bag and that was enough for the size of cake I made. )

Turn the heat up to medium, add a thin layer of shredded coconut to the skillet and stir it frequently until the coconut is a golden color.  Add to a bowl and set aside.

While you are toasting the coconut, you can have your chocolate ice cream sitting out to soften. (about 10 minutes)

Now you have everything ready to go to start assembling the ice cream cake.

Sprinkle the crumbled cookies on the bottom of the springform pan.  You will use approximately half of the crumbs for the bottom layer.

Spoon scoops of ice cream over the crumb layer until the entire crumb layer is covered with about an inch and a half layer of ice cream.  Sprinkle another layer of cookie crumbs and about half of your toasted coconut over the ice cream and drizzle with caramel.  Cover with plastic wrap and very gently press down just to even out the layer.  Be careful, the ice cream is soft and you don’t want to push it too hard.

Freeze this layer until it is firm.

Soften the dulce de leche ice cream for about 10 minutes.  Add a layer of dulce de leche ice cream to your springform pan.  If you have any more cookie crumbs left over, sprinkle them around the outer edge of the top of the ice cream layer.  Fill in with the rest of your toasted coconut and lightly drizzle with more caramel.  Cover and freeze until the ice cream cake is solid.

Remove the cake from the freezer and remove the springform ring.  Using the plastic wrap, lift the ice cream cake off the bottom of the springform cake pan and place the cake on your cake stand.  Slip out the plastic wrap.

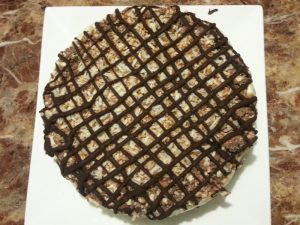
Melt about half a bag of chocolate chips in the microwave.  Transfer the chocolate to a small zip-lock bag.  Snip the corner of your baggie and squeeze the melted chocolate over top of the cake.  Place the cake back in the freezer uncovered until the chocolate is hardened then cover with plastic wrap.

Samoas Ice Cream Cake

And that’s it!  Slice and serve.  Be prepared to hear lots of mmmm’s, this is a great ice cream cake!  My son said it’s the best dessert he has ever had in his life.  Nice compliment!

Enjoy this delicious Samoas Ice Cream cake!

Happy Birthday Son!  Samoas Ice Cream Birthday Cake

If you like my recipes, be a sweetie pie and share on Facebook,
Like my page “I Love To Cook” and Pin these yummy recipes on Pinterest.  🙂


Here’s the Pinterest link for this recipe:  Samoas Ice Cream Cake


Sharon Springfield

 Sharon Springfield  


Sharon Springfield on PinterestSharon Springfield on FacebookFollow Me On Google+


http://sharonspringfield.com/images/cooking-blog-logo.jpghttp://sharonspringfield.com/wp-content/uploads/2013/07/youtube-150x150.jpg


Powered by WordPress Plugins – Get the full version!

 SAMOAS ICE CREAM CAKE

Categories
Crockpot Main Dish Onions Peas Slow Cooker Vegetables

Crockpot Field Peas & Ham

Crockpot Field Peas & Ham


It’s summertime and this time of year you can find fresh field peas at your local farmer’s market.  Here’s an easy way to cook those fresh peas in the crockpot.  You can also use fresh frozen peas.

Ingredients:

6 cups fresh field peas (shelled and rinsed)
1 envelope onion soup mix
water
1 ham steak, diced

Directions:

Place the peas in your crockpot and add enough water to just cover the peas.  Dump in the soup mix and stir in the diced ham.

Cook on low for approximately 2 – 3 hours.  Check the peas for doneness by squishing the pea with your fingers to see if it’s softened up.

*You could do the same thing with dried blackeyed peas that have been pre-soaked and rinsed, but look for frozen peas and use them if possible.  They taste so much better than dried peas.

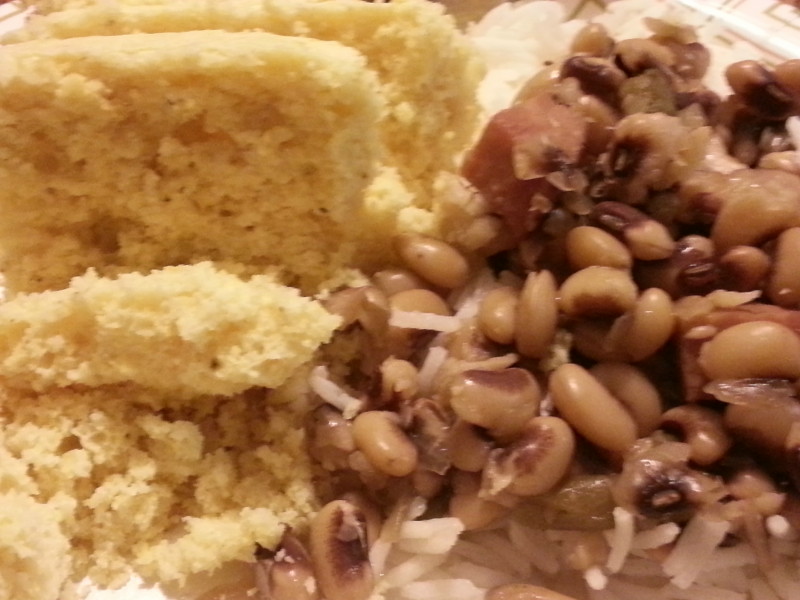
Serve over steamed rice with diced onions (optional) and cornbread.

Blackeyed Field Peas with Ham on Rice

Soul food at it’s finest!  I could eat this every day. 🙂

I hope you enjoy this easy recipe for field peas (blackeye peas) cooked in the crockpot.

If you like my recipes, be a sweetie pie and share on Facebook,
Like my page “I Love To Cook” and Pin these yummy recipes on Pinterest.  🙂

Here’s the Pinterest link for this recipe:  Crock Pot Field Peas & Ham

Sharon Springfield

Sharon Springfield  

Sharon Springfield on PinterestSharon Springfield on FacebookFollow Me On Google+

http://sharonspringfield.com/images/cooking-blog-logo.jpghttp://sharonspringfield.com/wp-content/uploads/2013/07/youtube-150x150.jpg


Powered by WordPress Plugins – Get the full version!

Crock Pot Field Peas & Ham

Categories
Breads

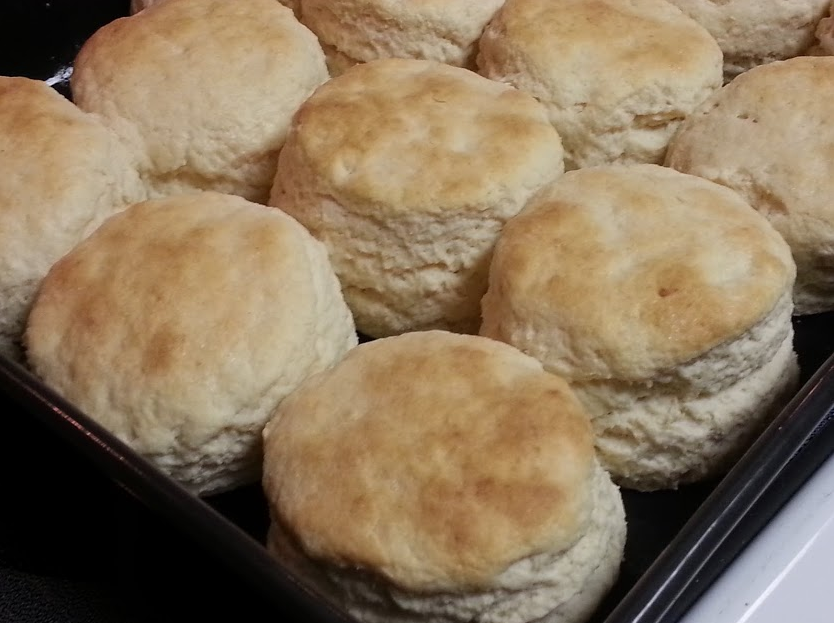
Fluffy Biscuits

Light Fluffy Biscuits


“Where’s the Biscuits?”   This is what my husband will jokingly say if I make a nice big dinner and there aren’t any biscuits.  So last night for dinner, I made these light, fluffy biscuits so that he wouldn’t be able to make his little joke.  What a spoil sport I am!

There are a few tricks to making great fluffy biscuits.  First of all, use cold butter cut into thin slices and cut it into the flour with a pastry cutter.

Add the milk all at once to the flour and stir it up with a fork.  Add additional flour until the dough is no longer sticky.  I usually end up adding up to 3/4 cup additional flour.

When you knead the dough, fold it over in half and press it down then repeat that about 4 or 5 times then put it on the counter to roll them out.

If you place the cut out biscuits with their sides touching in your baking pan, they kind of assist each other in rising up tall, versus spreading them apart on the baking dish.

After the biscuits are baked, brush the tops with melted butter.

Fluffy Biscuits

Ingredients:

2 cups self rising flour
1 tablespoon sugar
1 stick of butter
1 1/4 cup half & half

Directions:

Preheat oven to 450° F.  Combine flour and sugar in mixing bowl.  Cut butter into flour until crumbly.  Stir in half & half until moistened.  Add additional flour as you knead the dough until the dough is no longer sticky.

Sprinkle a little flour on a clean counter and rub some flour on your rolling pin.  Place the dough on the counter and roll it out to 1/2 – 3/4″ thickness.  Cut out biscuits using a round cookie cutter.  (I use a small can that has both ends cut off – like an olive can or green chile pepper can)

Place on baking dish with sides lightly touching.  Bake for 10 – 14 minutes.  Brush tops with melted butter.

These light, fluffy biscuits will be a hit at your next meal!  Enjoy!

If you like my recipes, be a sweetie pie and share on Facebook,
Like my page “I Love To Cook” and Pin these yummy recipes on Pinterest.  🙂

Here’s the Pinterest link for these awesome biscuits:  Light Fluffy Biscuits

Sharon Springfield

Sharon Springfield  

Sharon Springfield on PinterestSharon Springfield on FacebookFollow Me On Google+

http://sharonspringfield.com/images/cooking-blog-logo.jpghttp://sharonspringfield.com/wp-content/uploads/2013/07/youtube-150x150.jpg


Powered by WordPress Plugins – Get the full version!

Light Fluffy Biscuits

Categories
Desserts Mousse

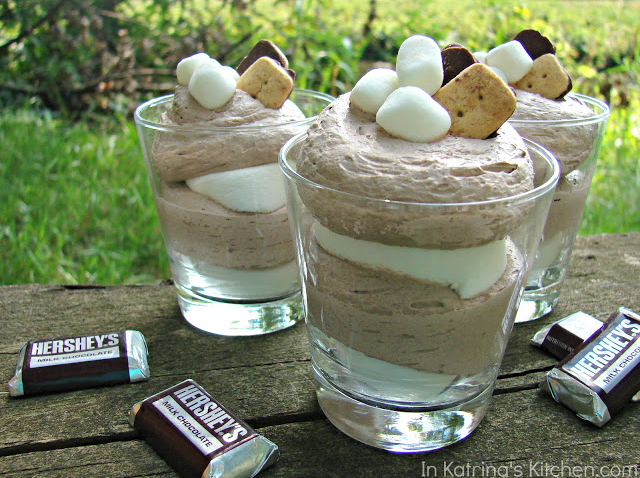
S’mores Mousse Cups

S'mores Mousse CupsToday’s recipe is from InKatrinasKitchen.com and is a recipe for S’mores Mousse cups.

S’mores Cups Recipe

YIELD: 8 mini dessert cups

PREP TIME: 15 minutes

TOTAL TIME: 3 hours, or overnight

“Fluffy S’mores no-bake mousse cups

INGREDIENTS:

  • 8oz Cream Cheese, room temperature
  • 4oz package of chocolate pudding (powder)
  • 2 Cups powdered sugar
  • 1/2 Cup Biscoff spread
  • 8oz tub of Cool Whip
  • 2-3 Tablespoons milk
  • marshmallows and graham crackers for garnish

DIRECTIONS:

  1. In the bowl of your electric mixer combine cream cheese, powdered sugar, pudding powder, milk, and Biscoff spread.
  2. Fold in Cool Whip
  3. Pipe into cups of any size and garnish with graham crackers and marshmallows.
  4. Chill for at least 3 hours or overnight (will become a firmer consistency)

NOTES:

  • I have also made this in a 9×13 dish layered between graham crackers.
  • Biscoff spread gives a hint of graham cracker taste in the dish. You can substitute peanut butter if you do not have Biscoff available to you.
  • I did not try this recipe with fresh whipped cream so I do not know if you can substitute it for the Cool Whip.”

 ~This delicious recipe brought to you by In Katrinas Kitchen 
http://www.inkatrinaskitchen.com/2012/09/smores-cups-staying-connected-verizon.html

If you like my recipes, be a sweetie pie and share on Facebook,
Like my page “I Love To Cook” and Pin these yummy recipes on Pinterest.  🙂

Here’s the Pinterest link for Smores Mousse Cups:  Smores Mousse Cups

Sharon Springfield

Sharon Springfield  

Sharon Springfield on PinterestSharon Springfield on FacebookFollow Me On Google+

http://sharonspringfield.com/images/cooking-blog-logo.jpghttp://sharonspringfield.com/wp-content/uploads/2013/07/youtube-150x150.jpg


Powered by WordPress Plugins – Get the full version!

Smores Mousse Cups

Categories
Cakes Desserts Pie Southern

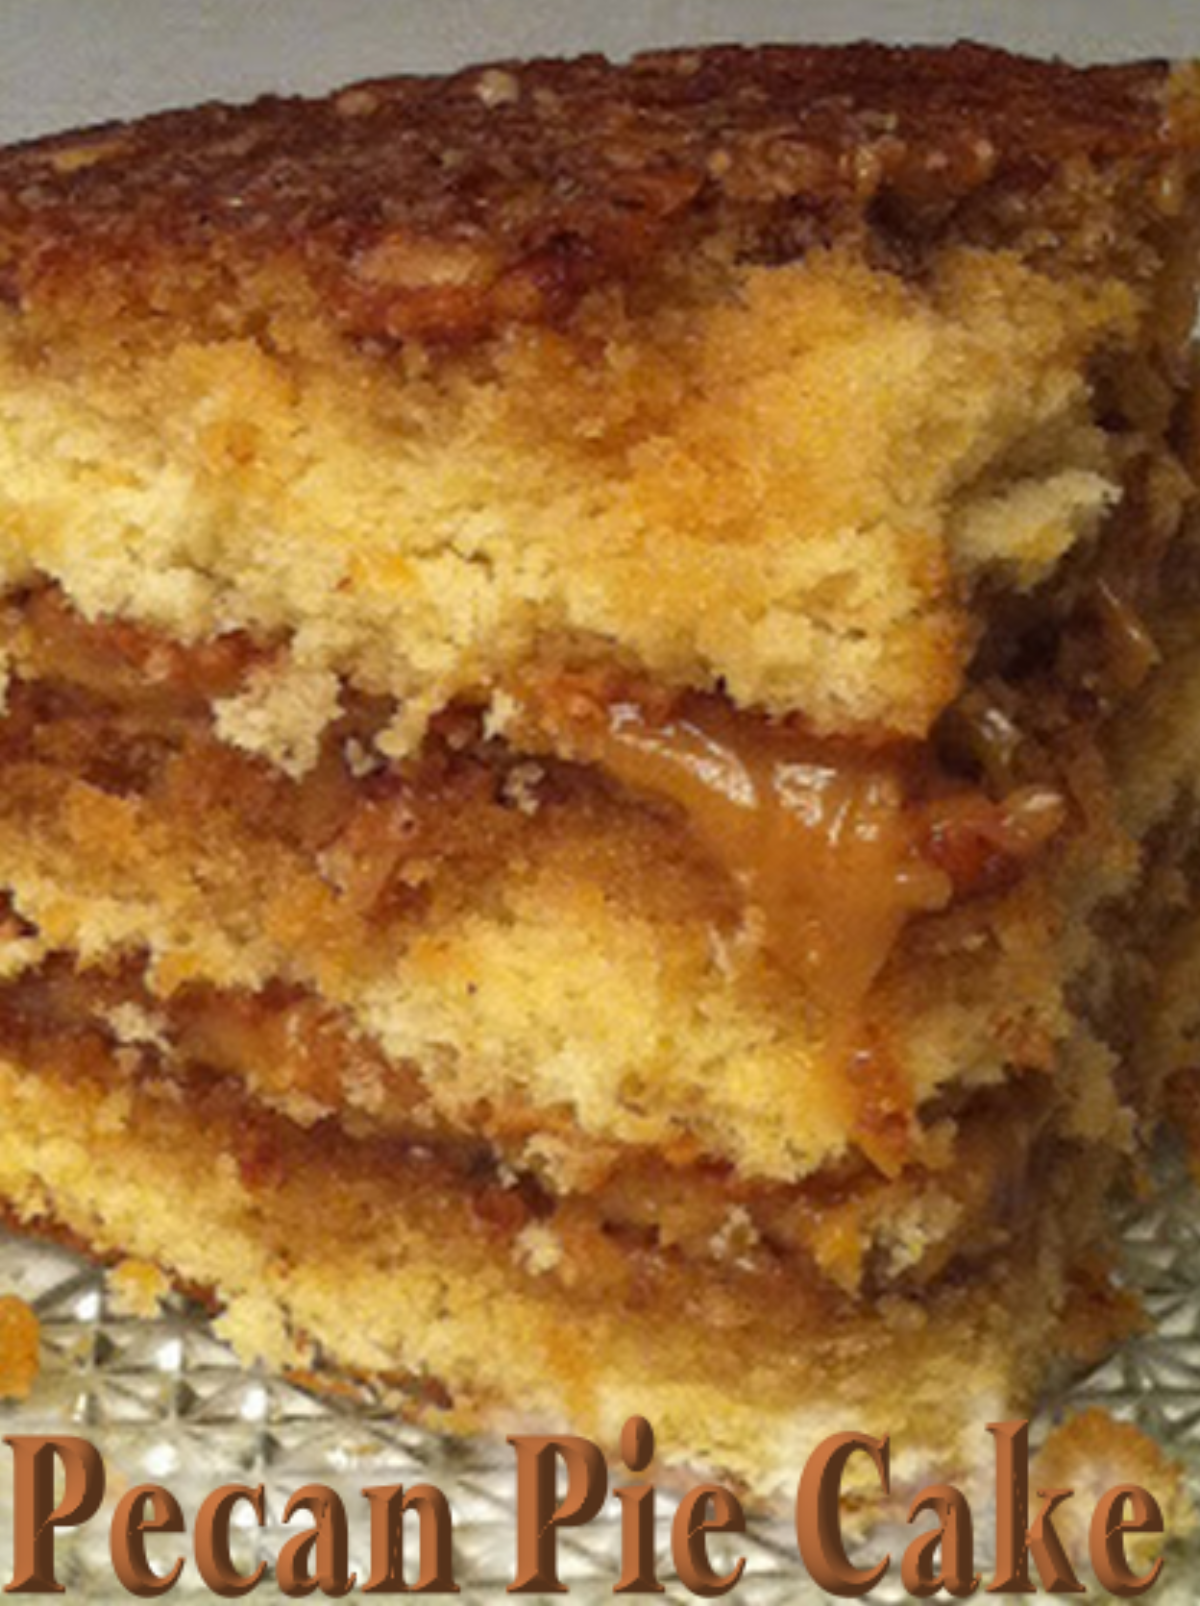
Pecan Pie Cake


Pecan Pie Cake

This recipe comes from a facebook post and is from the blog Sweet Jeanette. (http://sweetjeanette.blogspot.com/2011/12/pecan-pie-cake.html)  Jeanette got the recipe from Southern Living Magazine.

We all know Southern Living recipes are all awesome and Pecan Pie and Cake all rolled into one must be good.  So here’s the recipe:

Pecan Pie Filling

1/2 cup firmly packed dark brown sugar
3/4 cup dark corn syrup
1/3 cup cornstarch
4 egg yolks
1 1/2 cups half-and-half
1/8 tsp salt
3 TBSP butter
1 teaspoon vanilla extract (the real stuff)
Whisk together the first 6 ingredients in a heavy 3-quart saucepan until smooth. Bring to a boil over medium heat, whisking constantly, and boil for 1 minute, or until thickened. Remove from heat; whisk in butter and vanilla. Place a sheet of wax paper directly on surface of mixture to prevent a film from forming, and chill at least 4 hours.
Now for the cake….
Pecan Pie Cake
3 cups finely chopped pecans, toasted and divided
1/2 cup butter or margarine, softened
1/2 cup shortening
2 cups sugar
5 large eggs, separated
1 TBSP vanilla extract
2 cups all-purpose flour
1 tsp. baking soda
1 cup buttermilk
3/4 cup dark corn syrup
Sprinkle 2 cups pecans evenly into 3 generously buttered 9-inch round cake pans; shake to coat bottoms and sides of pans.
Beat butter and shortening at medium speed with an electric mixer until fluffy, and gradually add sugar, beating well. Add egg yolks, 1 at a time, beating just until blended after each addition. Stir in vanilla.
Combine flour and baking soda. Add to butter mixture alternating with the buttermilk, beginning and ending with flour mixture. Beat at low speed just until blended after each addition. Stir in remaining 1 cup pecans.
Beat egg whites at medium speed until stiff peaks form, and fold one third egg whites into batter. Fold in remaining egg whites. (Do NOT over mix). Pour batter into prepared pans.
Bake at 350 for about 20-25 minutes. I always set timer to go off 5 minutes before to be safe. Silly oven!
Check for doneness with the old toothpick inserted into center test.
Cool in pans on wire racks for about 10 minutes, then invert onto the wire racks.  Put some wax paper down under the wire racks… Trust me! You’ll be glad you did!
Brush the tops and sides of layers with corn syrup, and cool completely. (See, aren’t you glad you listened?)
Spread half of pecan pie filling on one layer, pecan side up. Place second layer, pecan side up, on filling, and spread with remaining filling. Top with remaining layer, pecan side up.

If you like my recipes, be a sweetie pie and share on Facebook,
Like my page “I Love To Cook” and Pin these yummy recipes on Pinterest.  🙂

Here’s the Pinterest link for Pecan Pie Cake:  Pecan Pie Cake

Sharon Springfield

Sharon Springfield  

Sharon Springfield on PinterestSharon Springfield on FacebookFollow Me On Google+

http://sharonspringfield.com/images/cooking-blog-logo.jpghttp://sharonspringfield.com/wp-content/uploads/2013/07/youtube-150x150.jpg


Powered by WordPress Plugins – Get the full version!

Pecan Pie Cake

Categories
Breakfast Hash Brown Potatoes Potatoes

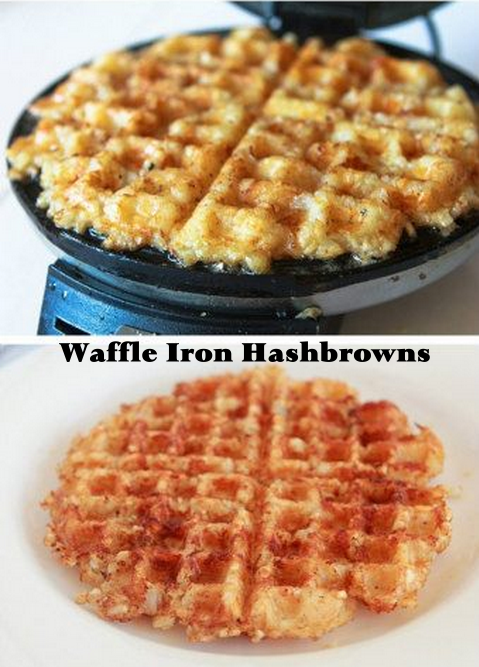
Waffle Iron Hashbrowns

Waffle Iron Hashbrowns

Here’s an neat trick that I saw on Pinterest for making waffle iron hashbrowns that I tried and loved and just had to share.  It was really easy, quick and made our breakfast more special than usual.

Here’s how I did it:

Thaw frozen tater tots and crumble into a bowl.  Heat waffle iron and brush with a little cooking oil.  (You can probably skip this step if your waffle iron is well seasoned.  I used oil because our waffle iron is new and it was probably unnecessary after all because the tater tots are already oily.)

Spread a layer of the crumbled tater tots evenly over the surface of the waffle iron.  Close the lid and mash it down really hard.  Let it cook until the waffle iron indicates that it’s done.  You can peek at it after a couple minutes.  Let it cook until it’s crispy and lightly browned.

Remove the cooked hashbrown from the waffle iron and repeat with the remaining potatoes until you’ve run out of potatoes.

If you like my recipes, be a sweetie pie and share on Facebook,
Like my page “I Love To Cook” and Pin these yummy recipes on Pinterest.  🙂

Here’s the Pinterest link for Waffle Iron Hashbrowns: http://www.pinterest.com/pin/280278776784238250/?ref=waffle-iron-hashbrowns

Sharon Springfield

Sharon Springfield  

Sharon Springfield on PinterestSharon Springfield on FacebookFollow Me On Google+

http://sharonspringfield.com/images/cooking-blog-logo.jpghttp://sharonspringfield.com/wp-content/uploads/2013/07/youtube-150x150.jpg


Powered by WordPress Plugins – Get the full version!

Waffle Iron Hashbrowns