Categories
Main Dish Tomatoes

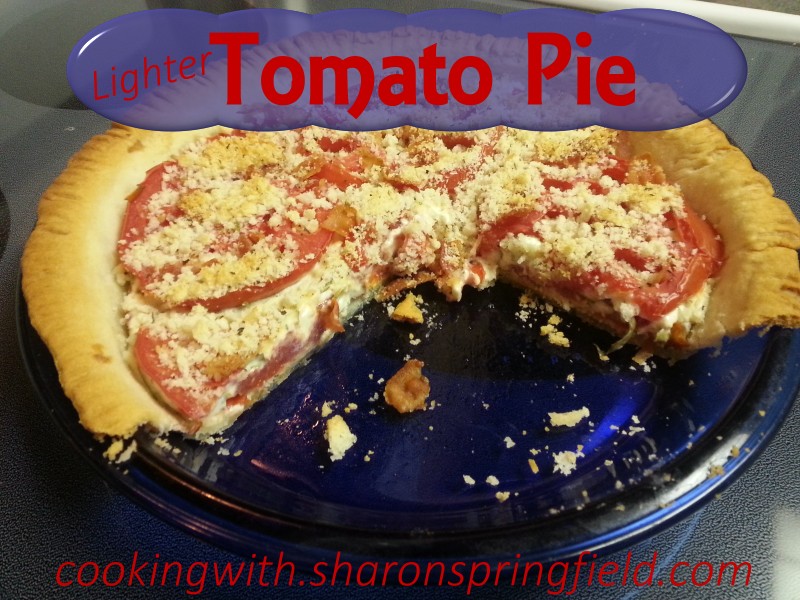
Lighter Tomato Pie

Lighter Tomato PieTomato Pie is a perfect light dinner for summertime.  If you’ve got a few nice fresh tomatoes that you don’t know what to do with, give this delicious tomato pie recipe a try.  As you can see, before I could even get around to taking a picture, a couple slices had mysteriously disappeared.  This is a lighter version than the Paula Deen tomato pie, which I found to be delicious, but also very heavy and greasy.  Give this lighter tomato pie recipe a try and enjoy the fresh tomatoes of summer.

Ingredients:

4 medium tomatoes
8 fresh basil leaves, thinly sliced
4 oz sliced prosciutto (or 4 slices of crisp bacon, crumbled)
1 frozen prepared pie crust
1/4 cup Panko bread crumbs
2 tablespoons grated Parmesan cheese
dash(es) garlic powder, dried oregano, dried basil
salt & pepper
1/3 cup light mayonnaise
1/3 cup garlic/herb cheese spread

Directions:

Preheat oven to 400°F

Slice tops off of tomatoes and scoop out and discard tomato seeds.  Slice tomatoes 1/4″ thick.  Lay tomato slices on a clean kitchen towel and lightly sprinkle with salt on each side.  Let sit for 15 minutes or so then press with another towel to soak up excess moisture from tomatoes.  This step prevents the pie from being mushy.

While waiting for tomatoes to dry out, slice prosciutto (or cook and crumble bacon).

Prick bottom and sides of pie crust.  Place on baking sheet (for easier handling) and bake for 8 – 10 minutes.

In a small bowl, combine bread crumbs, Parmesan cheese, garlic powder, dried oregano and dried basil.

In another small bowl, mix together the light mayonnaise, garlic/herb cheese spread and fresh basil.

To assemble the tomato pie, sprinkle 2 teaspoons of the bread crumb mixture into the pie crust.  Layer 1/2 of the tomato slices into the pie crust, sprinkle with salt and pepper then 1/2 of the prosciutto (or bacon).  Top with the mayonnaise – herb cheese mixture – spread evenly.  Repeat layers of tomato, salt, pepper, prosciutto (or bacon).  Sprinkle the remaining bread crumb mixture evenly over the top layer.

Bake for 20 – 25 minutes or until tomatoes are soft and topping is lightly browned.

May be served warm or cold.

Only 230 calories per 1/8th of pie.

This recipe is my modified version of a Publix Aprons recipe.

If you like my recipes, be a sweetie pie and share on Facebook,
Like my page “I Love To Cook” and Pin these yummy recipes on Pinterest.  🙂

Here’s the Pinterest link for this recipe:  Lighter Tomato Pie

Sharon Springfield

Sharon Springfield  

Sharon Springfield on PinterestSharon Springfield on FacebookFollow Me On Google+

http://sharonspringfield.com/images/cooking-blog-logo.jpghttp://sharonspringfield.com/wp-content/uploads/2013/07/youtube-150x150.jpg


Powered by WordPress Plugins – Get the full version!

Lighter Tomato Pie


Categories
Breakfast Casseroles Main Dish Quiche Vegetarian

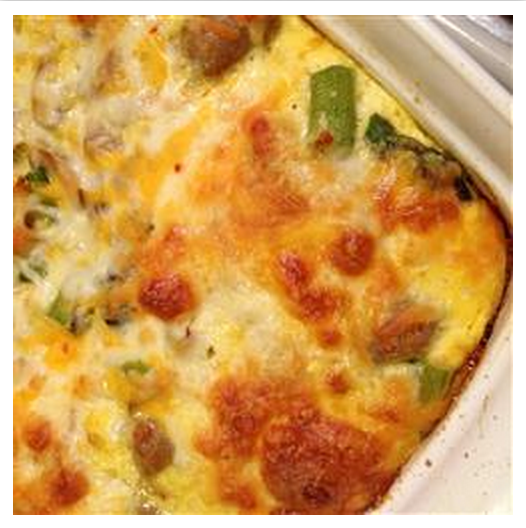
Asparagus Mushroom Strata

English Muffin Asparagus Mushroom Strata*Photo by Oliveland

INGREDIENTS:
2 teaspoons butter, or as needed
1 3/4 cups sliced crimini mushrooms
5 English muffins, split and toasted
1 cup shredded Colby-Monterrey Jack
cheese
1 pound fresh asparagus, trimmed and
cut into 1-inch pieces
1/2 cup chopped red bell pepper
1/2 onion, finely chopped
8 eggs
2 cups milk
1 teaspoon salt
1 teaspoon dry mustard powder
1/4 teaspoon ground black pepper
1 cup shredded Colby-Monterrey Jack
cheese

DIRECTIONS:
Melt the butter in a skillet over medium heat, and cook and stir the mushrooms until their liquid has mostly evaporated and the mushrooms are beginning to brown, about 10 minutes. Set the mushrooms aside.
Grease a 9×13 inch baking dish, and arrange 8 muffin halves, cut sides up, in the bottom of the dish. Stuff pieces of remaining muffins into the spaces between the halves. Spread 1 cup of Colby-Monterrey Jack cheese over the muffins in a layer, and distribute the asparagus pieces, mushrooms, red pepper, and onion over the cheese.
Whisk together eggs, milk, salt, dry mustard, and black pepper in a bowl, and pour the egg mixture over the muffins and vegetables. Cover the dish, and refrigerate overnight.
The next day, preheat oven to 375 degrees F (190 degrees C).
Remove the casserole from the refrigerator and let stand for 30 minutes. Spread 1 cup of Colby-Monterrey Jack cheese in a layer over the casserole.
Bake in the preheated oven until a knife inserted near the edge comes out clean, 40 to 45 minutes. Let stand 5 to 10 minutes before cutting into squares.
Original recipe at:
http://allrecipes.com/Recipe/Overnight-Asparagus-Mushroom-Strata/Detail.aspx

If you like my recipes, be a sweetie pie and share on Facebook,
Like my page “I Love To Cook” and Pin these yummy recipes on Pinterest.  🙂

Here’s the Pinterest link for this recipe:  Asparagus Mushroom Strata

Sharon Springfield

Sharon Springfield  

Sharon Springfield on PinterestSharon Springfield on FacebookFollow Me On Google+

http://sharonspringfield.com/images/cooking-blog-logo.jpghttp://sharonspringfield.com/wp-content/uploads/2013/07/youtube-150x150.jpg


Powered by WordPress Plugins – Get the full version!

Asparagus Mushroom Strata

Categories
Crockpot Main Dish Onions Peas Slow Cooker Vegetables

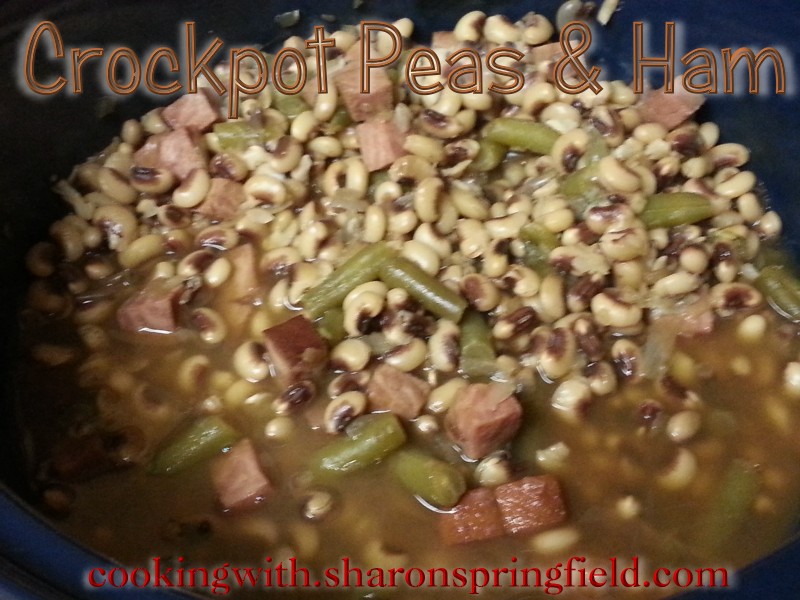
Crockpot Field Peas & Ham

Crockpot Field Peas & Ham


It’s summertime and this time of year you can find fresh field peas at your local farmer’s market.  Here’s an easy way to cook those fresh peas in the crockpot.  You can also use fresh frozen peas.

Ingredients:

6 cups fresh field peas (shelled and rinsed)
1 envelope onion soup mix
water
1 ham steak, diced

Directions:

Place the peas in your crockpot and add enough water to just cover the peas.  Dump in the soup mix and stir in the diced ham.

Cook on low for approximately 2 – 3 hours.  Check the peas for doneness by squishing the pea with your fingers to see if it’s softened up.

*You could do the same thing with dried blackeyed peas that have been pre-soaked and rinsed, but look for frozen peas and use them if possible.  They taste so much better than dried peas.

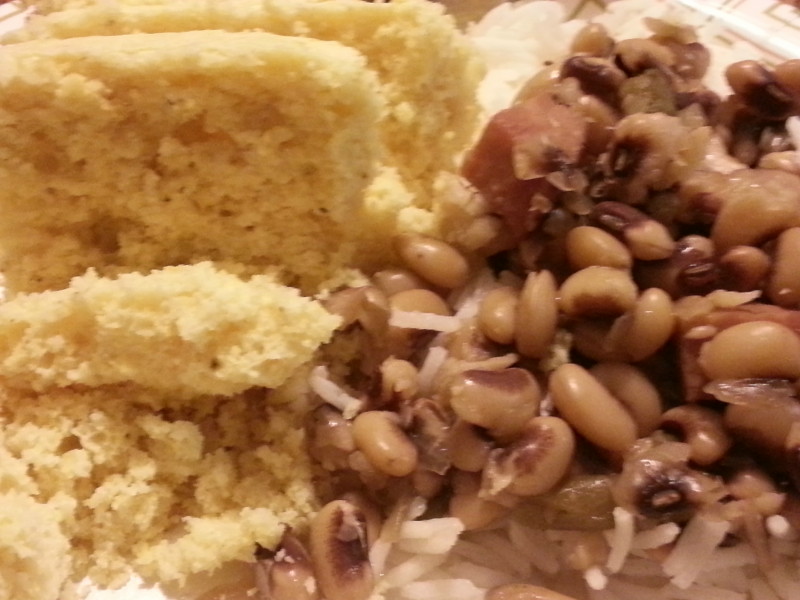
Serve over steamed rice with diced onions (optional) and cornbread.

Blackeyed Field Peas with Ham on Rice

Soul food at it’s finest!  I could eat this every day. 🙂

I hope you enjoy this easy recipe for field peas (blackeye peas) cooked in the crockpot.

If you like my recipes, be a sweetie pie and share on Facebook,
Like my page “I Love To Cook” and Pin these yummy recipes on Pinterest.  🙂

Here’s the Pinterest link for this recipe:  Crock Pot Field Peas & Ham

Sharon Springfield

Sharon Springfield  

Sharon Springfield on PinterestSharon Springfield on FacebookFollow Me On Google+

http://sharonspringfield.com/images/cooking-blog-logo.jpghttp://sharonspringfield.com/wp-content/uploads/2013/07/youtube-150x150.jpg


Powered by WordPress Plugins – Get the full version!

Crock Pot Field Peas & Ham

Categories
Rice Risotto Side Dishes

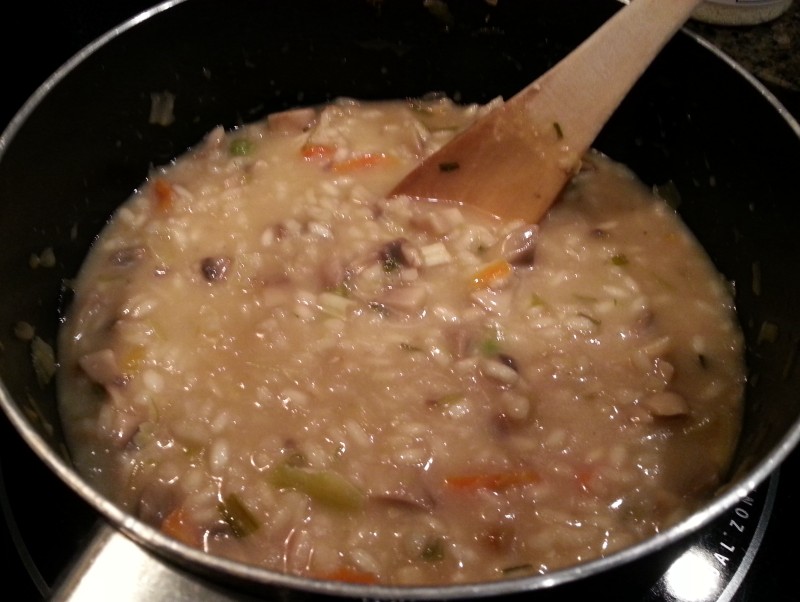
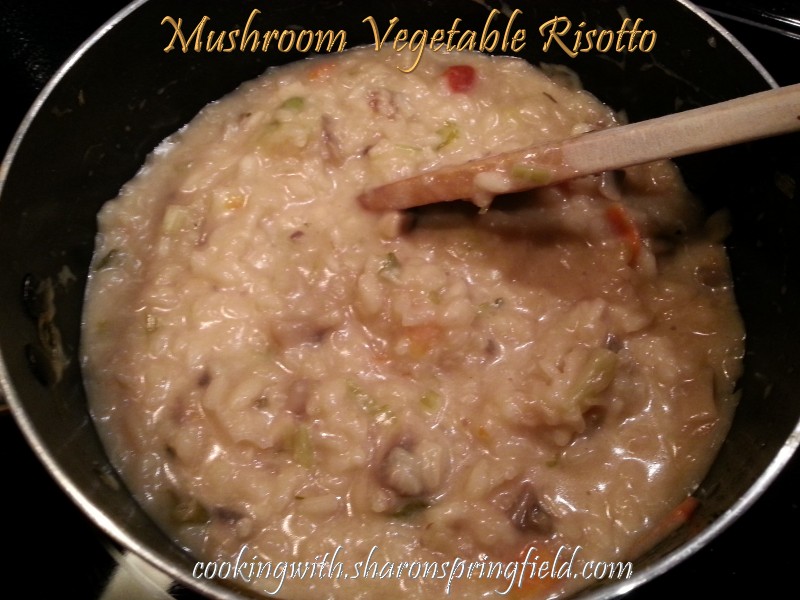
Mushroom Vegetable Risotto

Mushroom Vegetable Risotto

Delicious creamy Mushroom Vegetable Risotto

1 cup Arborio rice
2 Tbs butter
Salt
garlic powder
1 packet Lipton Vegetable soup mix
8 oz diced fresh mushrooms
8 oz chicken broth + additional broth added during cooking
white wine – some for the recipe, the rest for the cook  😉
1/4 cup shredded Swiss cheese
1/4 cup shredded Parmesan cheese

Saute rice in melted butter for a few minutes.  Add a dash of salt and garlic powder.  Add mushrooms and saute a couple minutes more.  Pour in 8 oz chicken broth, stir.  Bring to a simmer, stirring frequently.

As the liquids are absorbed, add more chicken broth or wine a little at a time and keep simmering, stirring and adding more liquids as needed until the rice is tender.  (This is kind of tedious but will be worth it!)

When rice is finally tender stir in the cheeses.

Ta-Dah!  Enjoy your Risotto!

If you like my recipes, be a sweetie pie and share on Facebook,
Like my page “I Love To Cook” and Pin these yummy recipes on Pinterest.  🙂

Here’s the Pinterest link for Mushroom Vegetable Risotto

Sharon Springfield

Sharon Springfield  

Sharon Springfield on PinterestSharon Springfield on FacebookFollow Me On Google+

http://sharonspringfield.com/images/cooking-blog-logo.jpghttp://sharonspringfield.com/wp-content/uploads/2013/07/youtube-150x150.jpg


Powered by WordPress Plugins – Get the full version!

Mushroom Vegetable Risotto

Categories
Casseroles Side Dishes Vegetables

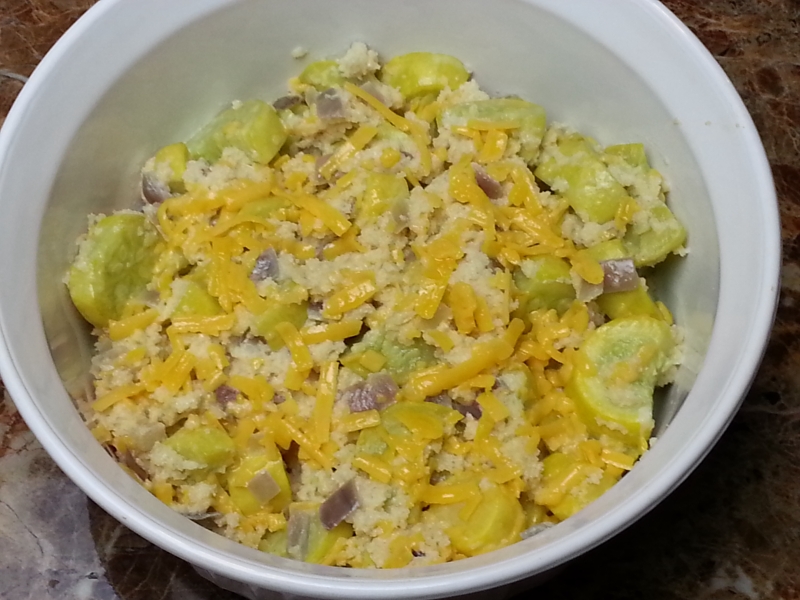
Squash Casserole

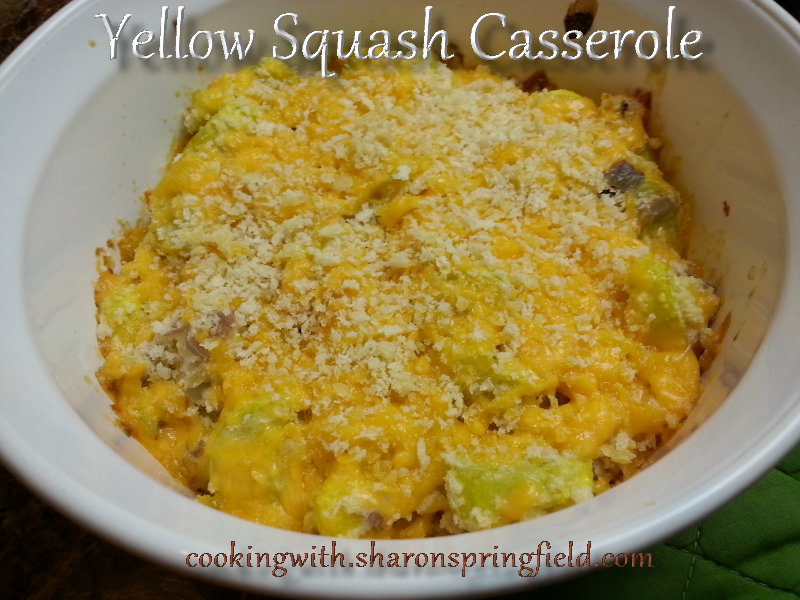
Yellow Squash Casserole

Squash Casserole

6-8 small yellow squash
1/4 cup diced onion
2 Tbs butter
1 egg
1/4 cup fat free half & half
1/4 cup shredded cheddar cheese
1/2 cup Panko bread crumbs or crunched up Ritz crackers
salt & pepper

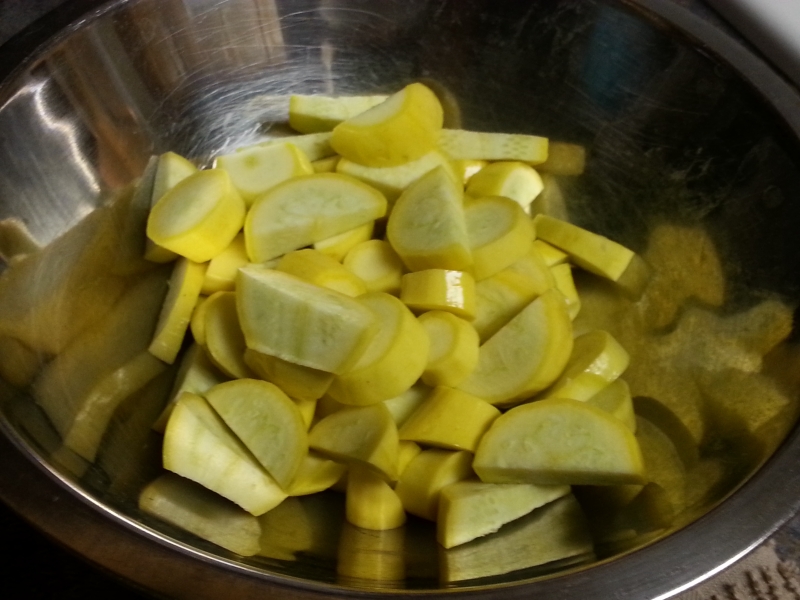
Wash squash and cut up.

chopped_yellow_squash

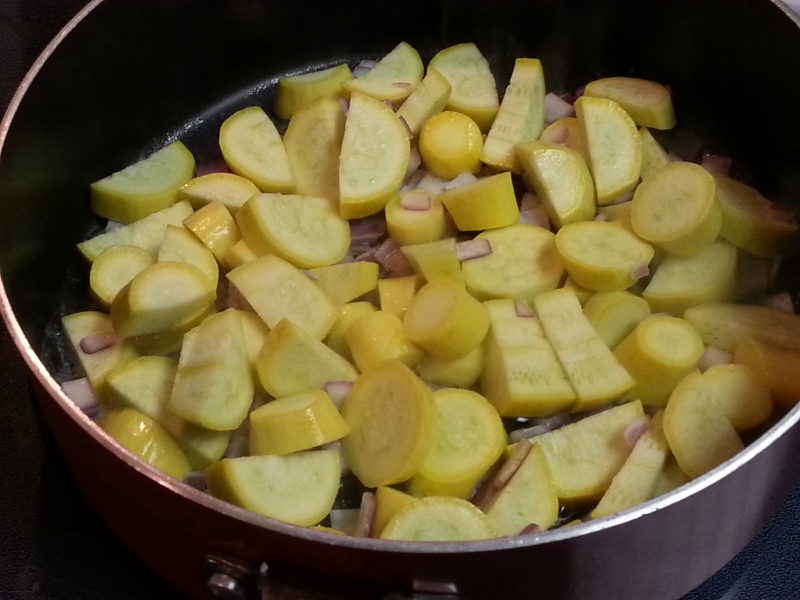
Melt butter in deep sided frying pan.  Saute squash and onions for a few minutes on med-high heat.  Add 2 Tbs water to the pan and cover with the lid..  Steam for 2 minutes then remove from heat.

saute'-yellow_squash

Meanwhile, in a mixing bowl, whisk the egg, half & half and seasonings.  Add squash and stir.  Add cheese & bread or cracker crumbs and stir until combined.  Pour mixture into 1 1/2 quart casserole dish.   Top with additional cheddar cheese and crumbs.

Yellow Squash Casserole - Cut Squash Up

Bake at 350º F for 20 minutes or until crumbs are crispy and cheese is all melted.

Squash casserole is a great side dish to most anything and is a great way to use up the plentiful supply of yellow summer squash.

Sharon Springfield

Sharon Springfield  

Sharon Springfield on PinterestSharon Springfield on FacebookFollow Me On Google+

http://sharonspringfield.com/images/cooking-blog-logo.jpghttp://sharonspringfield.com/wp-content/uploads/2013/07/youtube-150x150.jpg


Powered by WordPress Plugins – Get the full version!

Yellow Squash Casserole

Categories
Casseroles Potatoes Squash Vegetables

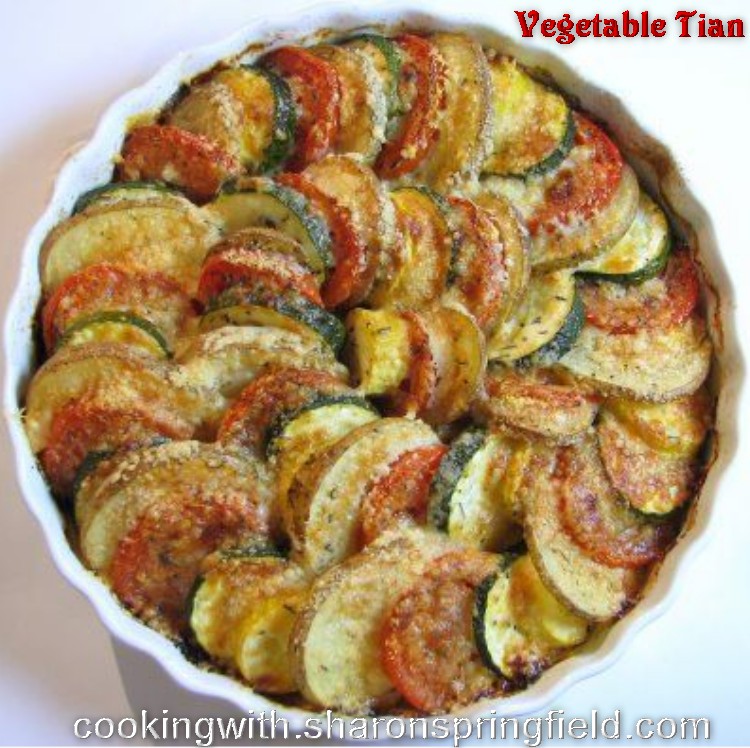
Vegetable Tian

Vegetable Tian

Vegetable Tian

2 tbsp olive oil (divided)
1 large sweet yellow onion cut in half and sliced
2 cloves of garlic, minced
1-2 russet potatoes, unpeeled
1 zucchini
1 yellow squash
3 large Roma tomatoes
Sea salt, freshly cracked black pepper, to taste
Dried thyme, to taste
1/2 cup of grated Parmesan cheese

Preheat the oven to 375 degrees. Coat a baking dish with olive oil cooking spray. Heat 1 tbsp of olive oil in a large skillet over medium heat. Once hot, add the onions and saute until translucent, about 8 minutes. Add the garlic and cook for another 60 seconds. Spread the onion mixture on the bottom of the greased baking dish.

Slice the potatoes, zucchini, squash and tomatoes in 1/4 inch thick slices. Layer them alternately in the dish on top of the onions, fitting them tightly into a spiral, making only one layer. Season with sea salt, black pepper and dried thyme, to taste. Drizzle the last tablespoon of olive oil over the top.

Cover the dish with tin foil and bake for 35 minutes, or until the potatoes are tender. Uncover and sprinkle the Parmesan cheese on top and bake for another 25-30 minutes or until browned.

Sharon Springfield

Sharon Springfield  

Sharon Springfield on PinterestSharon Springfield on FacebookFollow Me On Google+

http://sharonspringfield.com/images/cooking-blog-logo.jpghttp://sharonspringfield.com/wp-content/uploads/2013/07/youtube-150x150.jpg


[javascript src=”http://www.lduhtrp.net/widget-53493f68e4b091c1ddcff4ea-7496600?target=_top&mouseover=Y”]

Vegetable Tian

Categories
Broccoli Salads Side Dishes Vegetables

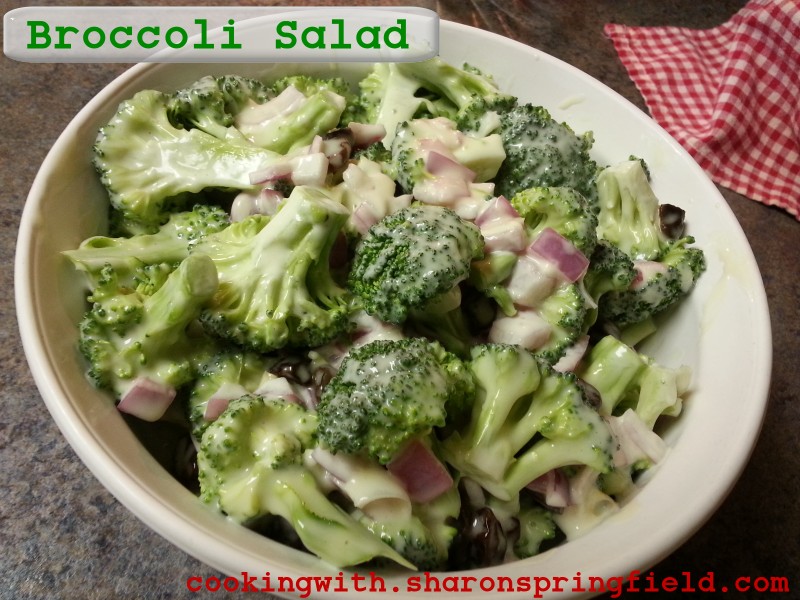
Broccoli Salad

Broccoli Salad

Broccoli Salad

This fresh broccoli salad could not be easier.  It goes together in a few minutes and is a real crowd pleaser!  🙂

All you need is:

fresh broccoli florets (organic if possible)
T. Marzetti’s Slaw Dressing
1/4 red onion, diced
1 snack size package of raisins
1 cup grated cheddar cheese*

Wash and cut the broccoli florets off the stalk.  Cut the big pieces into bite sized pieces.  Combine the rest of the ingredients in a large bowl and mix it all up.  *The pic above doesn’t show the cheese because I omitted it for a dairy free version.

Chill well.  Stir it around before serving to coat the broccoli with the dressing.  If you like, you can stir in chopped walnuts or pecans or sunflower seeds.

Sharon Springfield

Sharon Springfield  

Sharon Springfield on PinterestSharon Springfield on FacebookFollow Me On Google+

http://sharonspringfield.com/images/cooking-blog-logo.jpghttp://sharonspringfield.com/wp-content/uploads/2013/07/youtube-150x150.jpg


[javascript src=”http://www.lduhtrp.net/widget-53493f68e4b091c1ddcff4ea-7496600?target=_top&mouseover=Y”]

Broccoli Salad

Categories
Holidays Side Dishes Vegetables Vegetarian Yams

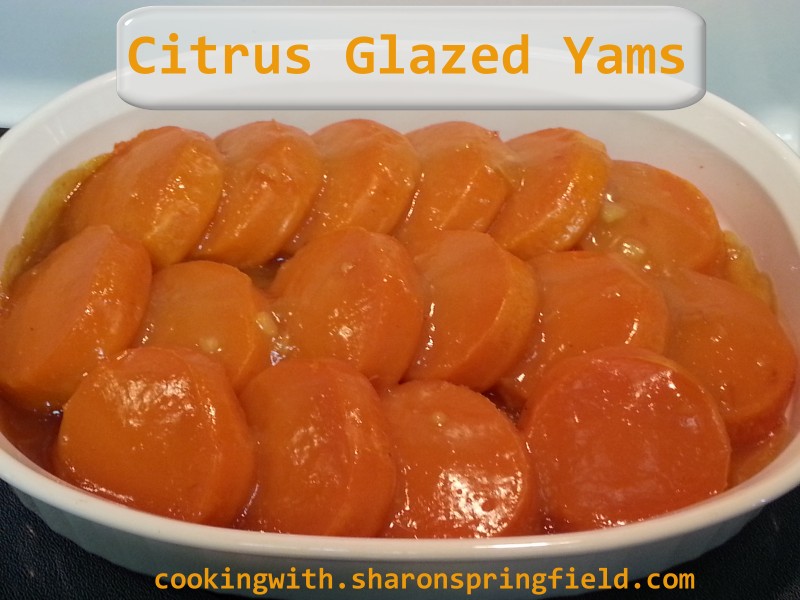
Citrus Glazed Yams

Citrus Glazed Yams

Citrus Glazed Yams

Citrus Glazed yams make a great side dish for holidays and goes well with ham, pork roasts, roasted chicken and turkey.  The glaze does double duty and can be used as a glaze for ham.  You can also top with pecans or your favorite chopped nuts.

Yam Patties (in the freezer section at the grocery store) OR medium sized sweet potatoes, baked, cooled, skins removed and sliced.
1/2 cup pecan halves
1 cup orange juice
2 heaping tablespoons orange marmalade
2/3 cup firmly packed brown sugar
1 tablespoon cornstarch
1/4 teaspoon salt
1 teaspoon vanilla extract

Arrange the sweet potato or yam slices in a lightly oiled baking dish.  Top with pecans.

Combine orange juice and next 5 ingredients in a small saucepan, stirring well.  Bring to a boil.  Boil until thickened, about a minute.  Remove from heat.  Stir in vanilla.  Spoon citrus glaze over the potatoes.  Bake, uncovered in a 350º F oven for 30 – 45 minutes or until glaze is thickened.  Makes 10 servings.

Citrus Glazed Ham

If you like my recipes, be a sweetie pie and share on Facebook,
Like my page “I Love To Cook” and Pin these yummy recipes on Pinterest.  🙂

Sharon Springfield

Sharon Springfield  

Sharon Springfield on PinterestSharon Springfield on FacebookFollow Me On Google+

http://sharonspringfield.com/images/cooking-blog-logo.jpghttp://sharonspringfield.com/wp-content/uploads/2013/07/youtube-150x150.jpg


[javascript src=”http://www.lduhtrp.net/widget-53493f68e4b091c1ddcff4ea-7496600?target=_top&mouseover=Y”]

Citrus Glazed Yams

Categories
Bell Pepper Mushrooms Onions Side Dishes Squash Vegetables Vegetarian

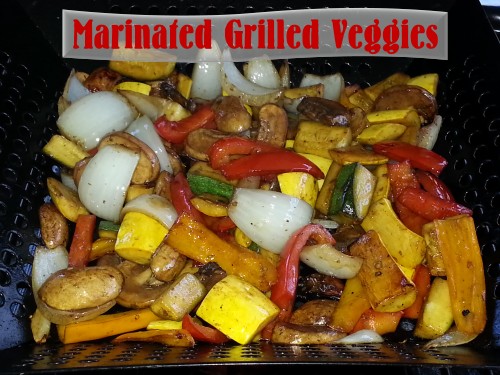
Marinated Grilled Veggies

Grilled Veggies


Marinated Grilled Veggies are so easy to prepare and they make a great side dish.  You can cut up your veggies up to a day ahead and let them marinate until you are ready to fire up the grill.  We have a grill basket that we use to make these grilled veggies.

Ingredients:

2 zucchini squash
2 yellow squash
1 sweet onion
1 red bell pepper
1 package fresh mushrooms

Wash, rinse and dry the veggies.  (I always use antibacterial soap and rinse well to remove any pesticides or other cooties.)  Rinse the mushrooms in just water, removing all the dirt, and set on a towel to dry.  Cut off the stems.

Prepare the marinade:

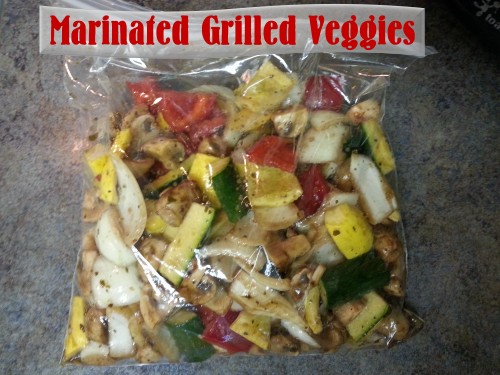
In a large ziplock bag, add 3 Tablespoons olive oil, 2 Tablespoons balsamic vinegar, 1 teaspoon minced garlic, 1 teaspoon oregano, a dash of seasoned salt such as Everglades seasoning or Adobo seasoning.  If you want to go the easy route, just use a balsamic vinagrette dressing, approx 1/4 cup.

Chop all the veggies up in bite sized pieces and add to the ziploc bag with the marinade.  Seal the bag and toss the marinade over all the chopped veggies.  If you are going to be cooking it right away, you can just leave it out on the counter while your grill heats.  If you aren’t cooking them immediately, refrigerate until you are ready to cook.

Marinated Veggies

Pre-heat your grill and the grill basket.  Add  approximately half of the marinated veggies to the basket.  Stir to evenly distribute them in the basket.  Close the grill lid and let them sizzzzzle away for a few minutes.  Stir every couple minutes.  When they are crisp-tender, they are done.  Scoop them out of the basket into a serving bowl.  Repeat with remaining marinated vegetables.

Serve as a side dish or make into a vegetarian dinner in a whole wheat wrap or on a bun.

We had ours with grilled fish and rice pilaf.

Blackened Grilled Fish on Rice Pilaf with Marinated Grilled Veggies


Marinated Grilled Veggies are SOOO GOOD that I would eat them every single day!  Give this a try, you will love it!

Pin it on Pinterest!  Here’s the link: http://www.pinterest.com/pin/280278776783968285/

If you like my recipes, be a sweetie pie and share on Facebook,
Like my page “I Love To Cook” and Pin these yummy recipes on Pinterest.  🙂

Sharon Springfield

Sharon Springfield  

Sharon Springfield on PinterestSharon Springfield on FacebookFollow Me On Google+

http://sharonspringfield.com/images/cooking-blog-logo.jpghttp://sharonspringfield.com/wp-content/uploads/2013/07/youtube-150x150.jpg


[javascript src=”http://www.lduhtrp.net/widget-53493f68e4b091c1ddcff4ea-7496600?target=_top&mouseover=Y”]

Marinated Grilled Veggies

Categories
Asian Chicken Ethnic - Regional Main Dish Rice

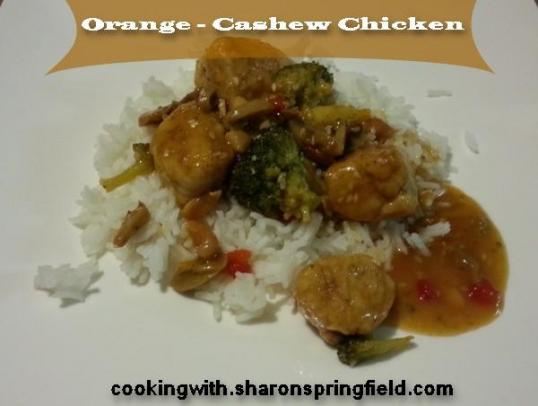
Orange Cashew Chicken Recipe

Orange Cashew Chicken Recipe


Orange – Cashew Chicken

Chicken:
1 lb chicken breast, cubed
1/4 cup flour
1 T flour
a couple dashes of paprika & garlic powder
2 T butter

Sauce:
1 cup orange juice
1 T cornstarch
1 tsp ground ginger
1 tsp minced garlic
fresh ground white pepper
1/4 cup orange marmalade

Veggies:
2 cups broccoli florets
1 (4 oz) can sliced mushrooms (drained) or use fresh sliced
2 T diced pimento (or fresh diced red bell pepper)

Toppings:
1/4 cup cashews
1 tsp sesame seeds

Directions:

Put flour, cornstarch, paprika and garlic powder in a large ziplock and mix around until blended.
Add chicken and toss until well coated.

Melt the butter in a large deep sided skillet or a wok. Add chicken (shake off excess flour) and stir fry until
chicken is golden brown and is done inside (firm when pressed on with spoon). Remove chicken to a bowl.

Whisk together the sauce ingredients and pour into the skillet. Add the veggies and stir until sauce thickens
and veggies are crisp tender. Stir in chicken and the toppings. Stir over steamed rice.

Orange Cashew Chicken Recipe


Connect with me! 🙂

Sharon Springfield

Sharon Springfield

 Sharon Springfield on Facebookhttp://sharonspringfield.com/wp-content/uploads/2013/07/youtube-150x150.jpgSharon Springfield on Pinteresthttp://sharonspringfield.com/images/cooking-blog-logo.jpg